Programming PIC processors with HEX files
The HEX file (and complete projects) you download from the page: technical/schematics
The micro-controllers used in your system Theremino are:
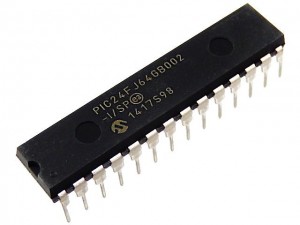
– PIC24FJ64GB002 (all Master, From 2012 at 2015)
– PIC24FJ128GB202 (future Master with 12 or 13 INOUT and 2 extra bits in the ADC)
– PIC32MX110F016 (future Master to 32 bit) (Note 1)
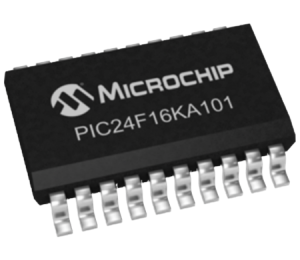
– PIC24F16KA101 (all slaves, Servant and CapSensor)
(Note 1) Probably we won't use models to 32 bit because, In addition to not give real advantages in speed and accuracy, restrict the location of the serial Pin. We prefer to use the new PIC of the series 24, that will allow 12 or even 13 PIN and containing the new ADC, four times more accurate.
ICSP Connector – In Circuit Serial Programming


All modules of the system Theremino have the ICSP connector, that allows for easy programming “in circuit”, with type PicKit2 programmer, Pickit3 or similar.
Connecting the programming cable
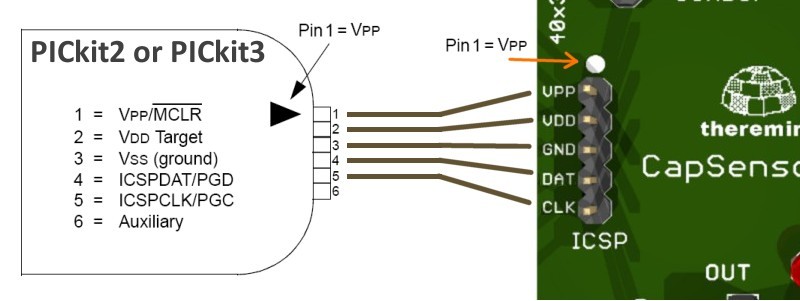
On the position of the Pin 1 is indicated by a white dot. In newer versions with a triangle, like the PicKit2 programmer and PicKit3. In all cases the Pin 1 is always indicated with “VPP”.
Usually the programming cable has six wires, While the ICSP connector have five. The sixth wire do I need to use the programmer as an oscilloscope, or Signal Analyzer, and you don't need to program, then we'll let unplugged.
In the screen printing of some CapSensors produced in the past the two words DAT and CLK were interchanged. But don't mind it, the right connection is what you see in this picture. All modules of the Theremino system have this arrangement, with the CLK at the opposite end of VPP.
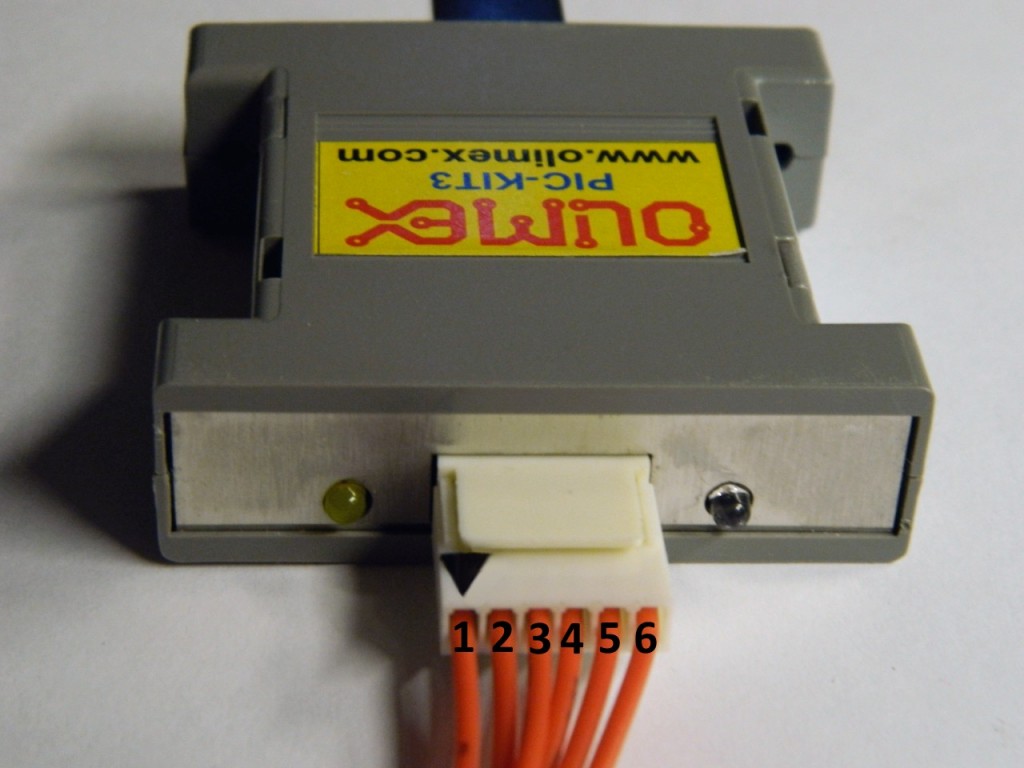
On some programmers find the location of the wire “1” It can be difficult. For example the PicKit3 of Olimex has no triangle, or p, to indicate this. Even reading the manual is unable to locate the Pin 1. The only images publishing do not refer to the connector on the controller, but on useless programming plate. So to find the Pin 1, use the following image:
Suggest that you mark your Pin 1 with a triangle or a black dot, holding the programmer with the LEDs and the connector at the bottom.
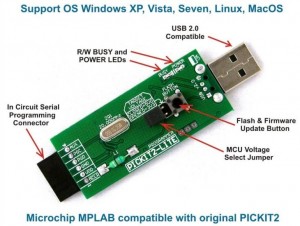
Buy a PicKit2
Better buy the PicKit2 which are easier to use of PicKit3.
On eBay is easy to find them, Here are some links:
http://www.ebay.it/itm/161327061057
http://www.ebay.it/itm/191911587734
http://www.ebay.it/itm/122179854117 (cheap but slow shipping from China)
Or at Amazon:
HTTPS://www.amazon.it/…….pickit2 (Amazon costing slightly more)
An example PicKit2 for sale on eBay – Click the image for a larger view.
If the previous link no longer valid please advise us. To find similar suggest that you do a search on eBay, with words “Usb Programmer PICKIT2”.
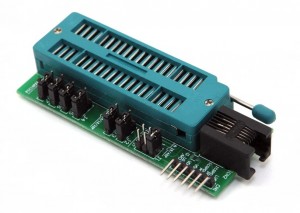
ZIF Sockets? No thanks.
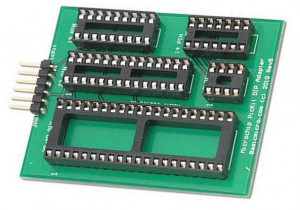
Planning “in circuit” It tests the complete form and you have the assurance that all is well. Instead clog is not even sure that we can schedule (missing external components and power supply). And you save time, It takes more time, to check out the PIC from the socket and move it to the final circuit. So don't buy the clogs along with programmer. Are expensive and remain unused in a drawer.
In-circuit debuggers?
Forget about it, are complicated, expensive and very slow, will never use them. There are better ways to debug, for example MPLAB emulators, but above all the cunning (change the right spot and see what happens) dichotomous and technique (divide the problem into two parts and repeat until you find the error).
Programming methods and programmers
The first difficulty level, plans to use the HEX file, prepared by us and to program them with the PicKit2. A little’ more cumbersome you program them with the PicKit3.
The third level, only for the brave, is MPLAB, It also allows you to modify the firmware and recompile it. Start MPLAB is difficult, because you must also install the compilers. In addition to this, It is said that with MPLAB and PicKIt2 you can program all PIC models. And almost certainly you can't use PicKit3.
And finally there is MPLAB X, that makes programming the PIC a real fun (quite similar to a game of chance). MPLAB X was written to allow programming on Apple and Linux, and so not only it is not possible to program with Mac OS and Ubuntu, but you are no longer able to program even with Windows. Us We couldn't get it to work on any of our PIC and these are some comments found on the net:
ENGLISH “… Unfortunately, the combination of new IDEs, compilers and devices can often result in rise of serious issues. Which is why it is often referred to as the "bleeding" edge, due to the pulling of hair, gnashing of teeth, sleep deprivation and occasional blood loss, While troubleshoot these issues ... "
Italian “…Unfortunately, the combination of new IDE, compilers and devices can often cause serious problems. This is often referred to in English, as “extent of the bleeding”, because of tearing your hair, teeth grinding, sleep deprivation and occasional bleeding, When solving these problems…”
Recommendations for programming
Unfortunately with hundreds of models of PIC, compilers, programmers & debuggers, No one can maintain parity between the developer tools. Before being able to fix all the bugs, Microchip designs some ten other PIC and start over. We are thus completing them ourselves, as we need.
This is not a fault of Microchip, absolutely! We are delighted that produce micro for every need, from microscopic ones up to very powerful dsPIC, and that they continue to produce increasingly better models, It's just hard with him. Other manufacturers (Atmel) continue to produce the same micro for fifteen years, the ADC are always the same, the performance still the same…
Soon we will pass to PIC24FJ128GB202 (with two extra bits in the ADC, then four times more accurate) and further complicate programming problems (especially for those on a PicKit3).
To operate some PIC and programmers may need:
– Manually choose the family (24) and the model of the PIC.
– Power the module from USB while programming.
– Feed from the same PC that is connected to the programmer.
– Use the High Voltage Programming (HVP).
– Perform an Erase.
– Disable Write Protect.
– Open, with Notepad, the file "PICkit2.ini" located next to "PICkit2V2.exe".
– Change the line "PE24: Y "into" PE24: N ".
The line "PE:24: No "disables loading of" Programming Executive ", in some cases, prevents program.
Instead set "Fast Programming" is a good idea. Dual programming speed.
How can we be sure that the PIC is programmed well
Better not to make memory readings because in many cases they deceive. To program you load your HEX, you press "Write" and checking the Green writing "Programming Successfully". In some cases they appear of the "Warning" in Orange, but no matter. The PIC is programmed well although there are Warning.
The only true test, is the USB that is activated and the led is blinking. On the Master led flashes fast as soon as the programming, instead on the slaves led blinks just after you configure the Pin with application HAL.
PicKit2 programmer application
This utility allows you to program the PIC without install MPLAB. Just get the HEX file and a PicKit2 programmer. The version that we publish is based on version 2.61 Microchip, that no more updates for many years. We have fixed many minor flaws and we renamed 3.0.
Don't be fooled by versions, the EXE is always called PicKit2V2 has been removed because it works on the PicKit2 programmer Version 2. The version of the application is not the 2 But what is written in the name of the ZIP file.
PicKit2_Programmer_V3.0.zip
Pickit2_Programmer_V3.0_WithSources.zip (version for programmers)
The version 3.2 also includes the “Device file” changed to program the new PIC24FJ128GB202 (we complete the firmware for 202 because they have insurmountable flaws). It also includes disabling “Programming Executive” to prevent problems with some PIC.
PicKit2_Programmer_V3.2.zip
Pickit2_Programmer_V3.2_WithSources.zip (version for programmers)
The version 3.3 works better. The bottom bar that indicates the completion of the operations now flows in a regular manner and until the end. The “Device file” It is amended to program some small PIC as the 12F1571 and there are other “Device File” that might be useful to those who know how to edit them and replace them. Finally when you go in the menu “Help / About” the version is properly reported as 3.3 (in previous versions it was always 3.0).
PicKit2_Programmer_V3.3.zip
Pickit2_Programmer_V3.3_WithSources.zip (version for programmers)
Application for the programmer PicKit3
The instructions for use, both in Italian and English, are in the file “Theremino_Pickit3_ReadMe” located in the folder “Docs”.
The program is “laptop”, do not install it in C:Programs but simply extract it from the ZIP, in una cartella dell’utente, for example, a subfolder of documents.
This ZIP file contains everything needed to program with PicKit3. There are also our changes to “PK2DeviceFile.dat”, with which we were able to schedule the new PIC24FJ128GB202.
PicKit3_Programmer_V4.0.zip
Pickit3_Programmer_V4.0_WithSources.zip (version for programmers)
Application to edit the file Devices.DAT
Unfortunately both the PicKit2 that PicKit3 are not complete and fail to program all PIC models. This application serves to complete and correct data (that are located in the file “PK2DeviceFile.dat”). We have used it to correct the bit masks for PIC24FJ128GB202 and with this fix we could program them.
DeviceFile_Editor.zip
Datasheets of PIC
These are the datasheets of all PIC used in system Theremino, accompanied with notes of application, data for the families of PIC and errata.
![]() PIC_Datasheets
PIC_Datasheets
Modify firmware and recompile it with MPLAB
To make changes to the firmware you must install MPLAB and the C compiler. We recommend that you install MPLAB version 8.92 from here: MPLAB_Archives (were to disappear here: MPLAB_IDE_8_92.zip)
After you install MPLAB C30 compiler must be installed: C30_Compiler
Register to download the compiler C30 is not binding, Microchip does not send SPAM. The C30 compiler must be installed in version “Lite”, lacking only a few optimization. The code is slightly larger, but it doesn't matter because we have very open spot in memory (were to disappear here: MPLABC30Combo_v3_31.zip)
Finally you have to load the complete project (not the only HEX file), fill it out, Verify that there were no errors during compilation and write it to the PIC.
MPLAB X
The new MPLAB X is known to have some difettucci, first of all you can't program the PIC. For those who want to try it, the link is this: MPLAB_X
Microchip Technology components
All modules of the system Theremino are made with micro-controllers Microchip series 24. The master uses a PIC24FJ64GB002, the slaves, using a PIC24F16KA101. These micro-controllers operate at 3.3 Volts for the voltage of 5 Volt quite unstable USB port, is stabilized with a Microchip regulator LDO (Low Dropout) the MCP1700 regulator type-3.3 V.
We chose the components of Microchip, by their very nature, that allowed us to implement the following innovations:
– UART transponder on a single wire.
– USB communication speed 12 serial megabits per second and up to 4 megabits/second.
– ADC breeze that, with proper oversampling, produce an effective resolution of over 14 bit (and up to 16 bit with the latest PIC24FJ128GB202)
– CTMU technology that facilitates the capacity measure very small.
– Low fuel consumption thanks to NW XLP™ Technology.
– Ability to build small modules thanks to SOIC Low Pin Count.
– Excellent support in DataSheet and ApplicationNotes.
– Comfortable and free development tools.

