Who uses AVG (or other similar antivirus) may well be false alarms.
Do not use commercial antivirus, cause unnecessary worries and then let the real virus. Read this page.
Our advice is to only use Defender, I have never betrayed.
In the case of false positives check the wires downloaded using a service online, for example this: HTTPS://www.virustotal.com/it
The virustotal service go about 60 antivirus and it is quite normal that one or two of them may be wrong. But if there are 58 or 59 which give a positive result you can trust. Who just don't trust can explore the source and recompile them himself on his computer. Anyway do not worry, We have better things to do than write viruses.
HAL – Hardware Abstraction Layer
The HAL connects the hardware of InOut with high-level software via USB and Slots
If you use the USB hardware modules, then the HAL is indispensable and must remain powered on, You can minimize it, but must remain in operation.
If you do not use USB hardware, then the HAL is not necessary, System applications can communicate with each other, through the slots, even without HAL.
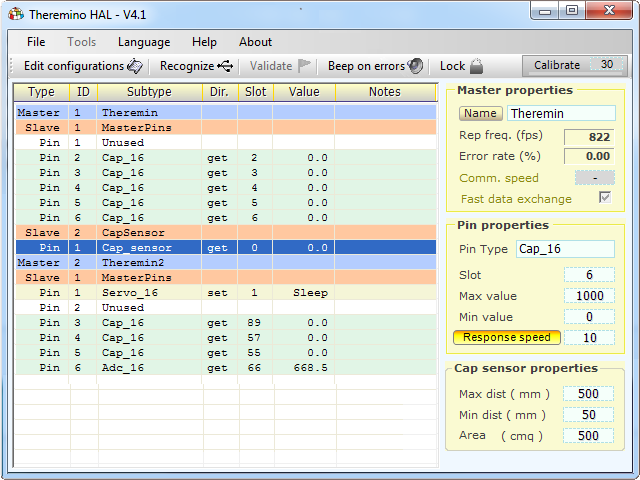
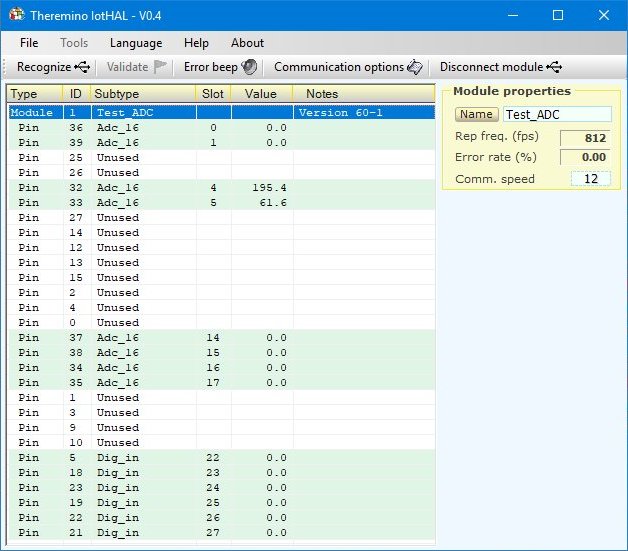
The indication Rep Freq. (FPS) Valori approximate indica. The measured values are quite right around 200 fps and become increasingly incorrect (by default, and very), FPS as you grow and approach 1000. We do not modify the read function because now we are all used for years to his instructions and change would create too much confusion. However, for all automation uses and reading of a repeat sensors higher 100 FPS is always enough.
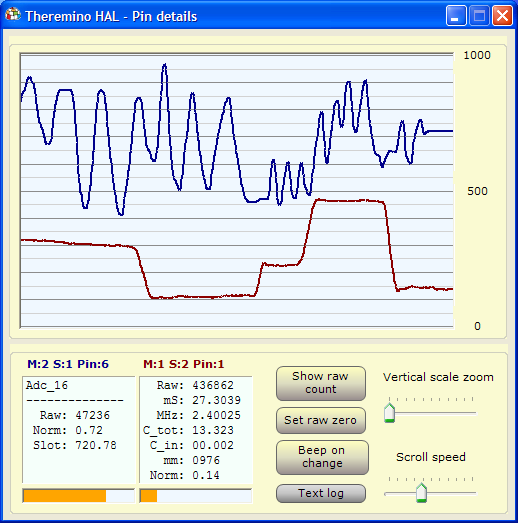
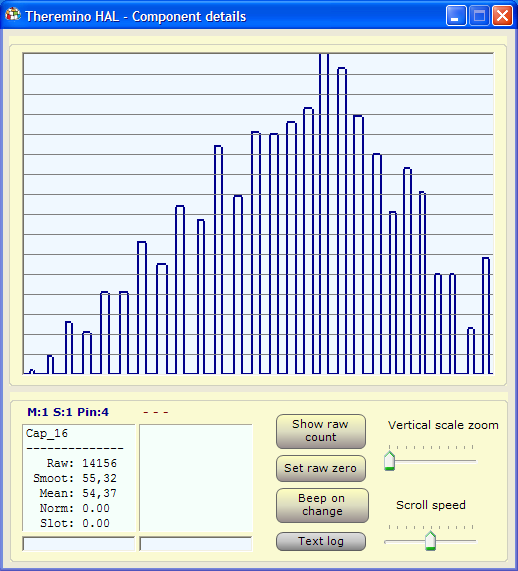
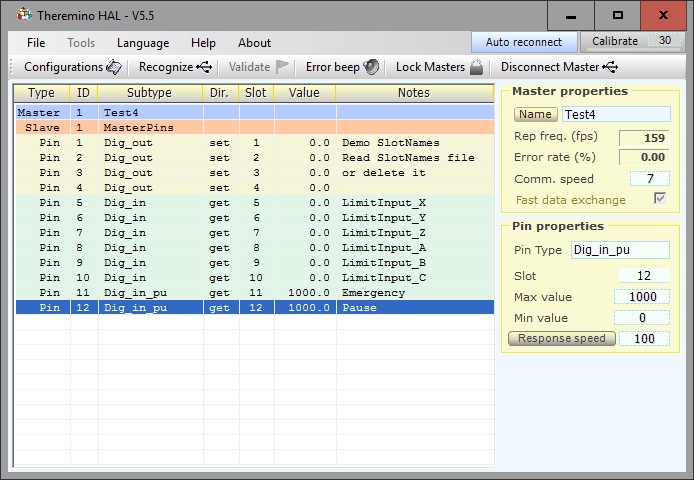
The application HAL standardizes the sensor data in a range of easily usable and provides testing and debugging graphic (Oscilloscope).
Tips for getting started: The application “Theremino_HAL.exe”, does not require installation and can be run in any folder on your system – Double clicking on a line opens the window graphic that shows the progress of the signal on that line – With a single click on a line and clicking on another line you can see them at the same time – All spin boxes are editable using the keyboard, with the mouse up/down, with the mouse wheel and with the arrows up and down – Finally, during the tests, It is very convenient to change the values in the column “Value” with the mouse (Press the left button on a column number “Value”, hold it down and move the mouse up and down)
Transient errors caused by surges on Input pins: Sometimes, touching the pins with your fingers, the HAL program stops communicating with hardware, writes a red line with the message "disconnected" and you have to press "Recognize". This will occur if the body is charged with static electricity and emits a small electric shock. All components are carefully chosen and never break, But even if you don't see the spark, It's always tension of many thousands of Volts, who send haywire temporarily serial communication and USB port. During the tests we take special care to handle forms only from off, or touch before the mass (for example the USB connector). The final design should always include an insulating enclosure that prevents users from touching live metal parts.
– – – – – –
Theremino_HAL release notes
Notes for previous versions (from 2.0 the 7.4) collected in files:
OldVersions_ITA.rtf
OldVersions_ENG.rtf
Version 7.5
– Adding zero calibration at startup.
– Correct label MinValue MaxValue and others to change language
– Deleted configuration error Adc24 Pins in the absence
– If you try to edit a SlotNames file does not exist it is created
– Trimming the value by clicking on each point of the line of the Pin
– The name of the slot (If there is) shows the details of the Pin
– After “Edit configuration” the configuration is reloaded correctly
Version 8.0
Added antialiasing in oscilloscope !!!
Added Min and Max to the oscilloscope settings!!!
Deleted ListView flicker !!!
Removed error CapSensor with firmware 2 and 3 (error adc24)
Added Chinese and Portuguese languages menu
Corrected by FastPwm “Cycle From Slots” and MaxValue other than 1000
Added SHIFT and CTRL on TextBox
– Up/Down = +/-1
– Pageup/PageDown = +/-10
– Shift = *100
– CTRL = *10
– ALT = /10
Deletes the column K.
Centered text in list titles
Increased reliability of Save-Load the configuration
The errors are reported correctly NotConfigured and NotFound
Documentation updated
Version 8.1
Version not published.
Version 8.2
Correct commands “Configuration backup” that were not working properly.
Improved commands that you send in the “Command slots”, and the answers you can get.
Now applications can learn the number of masters that have been recognized
and also to know if one of them stops working.
For more information read the pages 5 and 6 HELP file updated (Italian and English).
Version 8.3
I tipi in Pin Servo8, Servo16, Pwm8, Pwm16 and PwmFast now start in Sleep
The zero slot is reserved for commands and messages, so you can not assign it to Pin by mistake.
When you set a new name for the module, if the profile already exists you are warned.
The error was happening in some cases by assigning a new name.
The icon has improved. All applications of the system will have new icons, letters to distinguish them.
To see the text of the icons at the bottom bar of Windows, you must create links to applications, on the desktop.
Version 8.5
Eliminated errors by type Period Pin when due to disturbances time becomes less than 50 uS
When you reduce the number of Pin Adc24 the background type is cleaned up properly.
Version 8.6
This version allows Windows to shut down without the message “This app is preventing shutdown”
Version 8.7
This version automatically reloads the file “SlotNames.txt” when modified by an external application (usually SignalScope, SlotViewer o Notepad).
Version 8.8
Deleted text in the Notes column for Encoder_B and ADC24_ch_b
The conversion of the incoming numeric value from the Slots to the STEP does not give errors even with very large numbers.
German is now also included in the language selection menu.
Version 8.9
Eliminated errors that occurred in FastPWm type pins (lost the Frequency From Slot configuration)
Added commands through Text Slots, read the documentation.
The first Master (with firmware from 1.0 to 2.0) do not work with the HALs 7. x version. The versions of HAL from 8.0 onwards, should operate even older masters, but also keep this 4.6 for safety.
The latest versions of HAL can be used with the firmware from 1.0 to 2.0, are as follows:
Theremino_HAL_V4.6.zip
Theremino_HAL_V4.6_WithSources.zip
If you have still the Master with older versions of firmware can send them back to Lello (lello@thereminoshop.com), that free upgrades them to version 5.
Get the modules already programmed
Lello (maxtheremino seller on ebay) he can provide you with pre-programmed modules and can help you make them work.
eBay maxtheremino
Mail Lello (ufficiotecnico@spray3d.it)
Downloads by Theremino HAL – Version 8.9
Theremino_HAL_V8.9
Theremino_HAL_V8.9_WithSources (for programmers)
For all systems from Windows XP to Windows 10, both 32 which in 64 bit (Linux and OSX with Wine)
Theremino_HAL_CSharp_V8.8_WithSources (C # programming)
The C # version facilitates the “Porting”, towards Android and Mac, who prefer the C-Like syntax. This version, it works exactly the same as the original one except the commands through the Text Slots which only work from the versions 8.9 onwards. For normal use, However, we recommend that you not use it, Since it is less tested and slightly less efficient, because of the harder string handling, C-Like languages.
– – – – – –
Update your applications with the latest version of HAL
Many applications using the HAL, for example Theremino CNC and Theremino Dolfrang, may contain older versions of HAL. These applications can continue to use the older version with no problems. But if you want to update them with the latest version of HAL you can do it easily. You just have to be careful not to cover even their own configuration file.
How to update applications that contain an earlier version of HAL:
– Download the zip version of HAL.
– Open the folder of your application to update.
– Find the location of the file "Theremino_HAL.exe" with its "Docs" folder.
– Replace the file "Theremino_HAL.exe" and "Docs" with all the files in the ZIP.
The file "Theremino_HAL_ConfigDatabase.txt" and "SlotNames.txt" should not be replaced because they contain their own configurations.
Those who want to use Visual Studio to inspect, modify and rebuild the application, should also replace all files in the folder “Sources”.
– – – – – –
![]()
![]() Download the documentation in pdf format
Download the documentation in pdf format
The PDF files of the documentation are already in the folders from the HAL application but you can also download them from here. And sometimes these files are even more up-to-date than the ones found in the application..
ThereminoHAL_Help_ENG.pdf
ThereminoHAL_Help_ITA.pdf
ThereminoHAL_Help_CHI.pdf
![]()
![]() Downloading books in ODT format
Downloading books in ODT format
Those who know these languages, could open the file in Open Office, fix them and send them to us. For other languages, you can take the file and have it translated to English: onlinedoctranslator that is great, a breeze and respects the formatting.
ThereminoHAL_Documentation_ENG_ITA_ESP_JPN
ArduHAL – Use Arduino modules instead of the Master
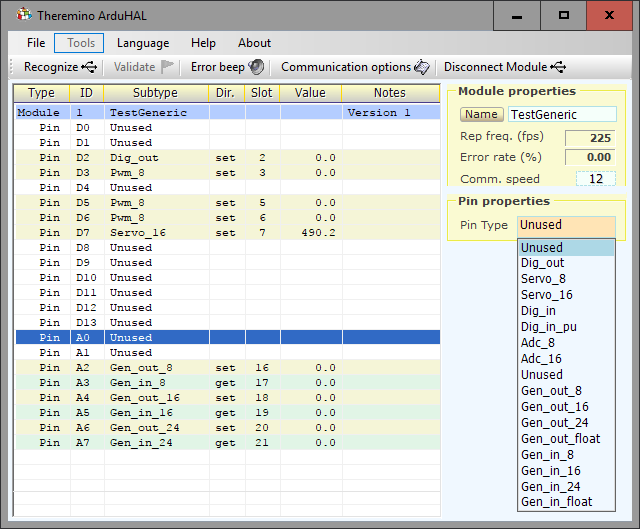
The ArduHAL application allows you to easily use the Arduino modules. All types of the most common Input Output are ready. Why you should not schedule, just configure the inputs and outputs and suffered the direct link between the software on the PC and the sensors.
The Arduino, using the ArduHAL application, can use the over one hundred applications System theremino, all free and Open Source, to read the data and control outputs. By generators Oscilloscopes, the thermostats, musical applications, the games, etc..
In order to know quickly the characteristics of ArduHAL read This article. Otherwise, read the documentation that you download below.
ATTENTION : We use Arduino modules as output for PC input devices. Then the credits that we do not have a judgment about Arduino but apply only in this particular area of use, read this post .
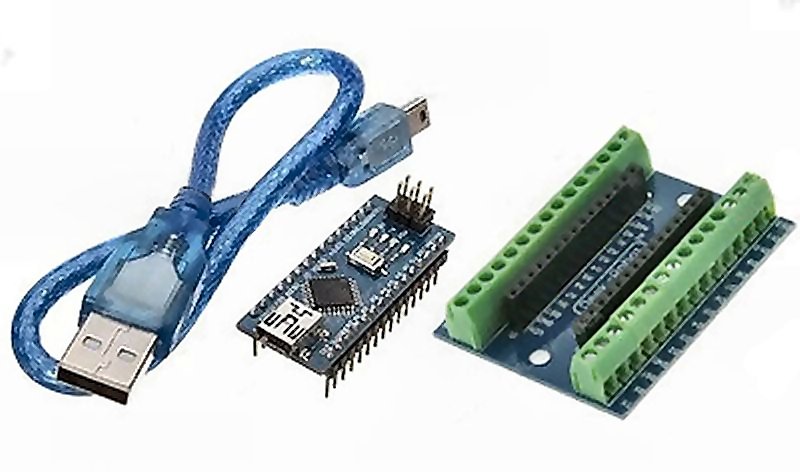
Arduino modules that work best (in the particular way in which we use them ourselves) are the Arduino Nano with chip CH340. The CH340 chip is on the bottom of the Nano and recognize it because it has many fewer pins of FT232 (16 PIN against 28).
From version 1.4 by ArduHAL you can also use the Arduino with the FT232 chip but the frequency of communication is a 30% bottom, because they can be used in multithread. Read page eight of the file “Theremino_ArduHAL_Help”
ATTENTION : If the asynchronous mode is not enabled and the "loop()"Arduino contains slow code, It may be unable to communicate with Arduino. The list dell'ArduHAL will remain empty and then you can not enable asynchronously. In this case you will have to comment on everything that's in the "loop function()Arduino ", program it and press "ACK". And finally enable asynchronously.
The indication Rep Freq. (FPS) Valori approximate indica. The measured values are quite right around 200 fps and become increasingly incorrect (by default, and very), FPS as you grow and approach 1000. We do not modify the read function because now we are all used for years to his instructions and change would create too much confusion. However, for all automation uses and reading of a repeat sensors higher 100 FPS is always enough.
Download the most up-to-date documentation files (23-03-2024)
Theremino_ArduHAL_Help_ITA.pdf
Theremino_ArduHAL_Help_ENG.pdf
Theremino_ArduHAL_Reading_I2C_Sensors_ITA.pdf
Theremino_ArduHAL_Reading_I2C_Sensors_ENG.pdf
Original documentation file in ODT format (23-03-2024)
ArduHAL_Docs_ODT.zip
Get the forms
Lello (maxtheremino seller on ebay) he can provide you with pre-programmed modules and can help you make them work.
eBay maxtheremino
Mail Lello (ufficiotecnico@spray3d.it)
Notes for versions of ArduHAL
Version 1.1 – This is the first published version.
Versions 1.2 and 1.3 – Small fixes
Version 1.4 – The ways “Async and “Polling” are easily selectable from ArduHAL application without having to change the firmware and recompile it. The way “Polling” allows you to use all sorts of Arduino with the FT232 chip.
Version 2.0
Added antialiasing in oscilloscope !!!
Added Min and Max to the oscilloscope settings!!!
Deleted ListView flicker !!!
Added Chinese and Portuguese languages menu
Added SHIFT and CTRL on TextBox
– Up/Down = +/-1
– Pageup/PageDown = +/-10
– Shift = *100
– CTRL = *10
– ALT = /10
Deletes the column K.
Centered text in list titles
Increased reliability of Save-Load the configuration
Version 2.1
Correct commands “Configuration backup” that were not working properly.
Improved commands that you send in the “Command slots”, and the answers that you can get.
Now applications can learn the number of forms that have been recognized
and also to know if one of them stops working.
For more information read the pages 14 and 15 HELP file updated (Italian and English).
Version 2.2
New keywords “genericWriteFloat” and “genericReadFloat”
simplify the transfer of floating point numbers.
The Pin set as GEN_OUT_xx and GEN_IN_xx are no longer initialized,
so you can use the Arduino firmware.
For more information read the pages on Pin “generics” in the HELP files updated (Italian and English).
Version 2.3
I tipi in Pin Servo8, Servo16, Pwm8, Pwm16 and PwmFast now start in Sleep
The zero slot is reserved for commands and messages, so you can not assign it to Pin by mistake.
When you set a new name for the module, if the profile already exists you are warned.
The error was happening in some cases by assigning a new name.
The icon has improved. All applications of the system will have new icons, letters to distinguish them.
To see the text of the icons at the bottom bar of Windows, you must create links to applications, on the desktop.
Version 2.4
The icon has improved. All applications of the system will have new icons, letters to distinguish them.
The icon text is visible on the bottom bar even if you do not have a link on your desktop.
Version 2.5
This version automatically reloads the file “SlotNames.txt” when modified by an external application (usually SignalScope, SlotViewer o Notepad).
Version 2.6
Added commands through Text Slots, read the documentation.
Version 2.7
Fixed a bug that prevented more than one module from being opened with some CH340 driver versions.
Module names are now recognized even if they are lowercase or uppercase.
Added the ArduHelper application that allows you to change the color of the lower part of the Arduino IDE from the original Dark Red to Black colors (illegible) to a normal Black on White (only works with IDEs of 1.xxx versions)
Download the application Theremino ArduHAL Version 2.7
Theremino_ArduHAL_V2.7
Theremino_ArduHAL_V2.7_WithSources (for programmers)
For all systems from Windows XP to Windows 10, both 32 which in 64 bit (Linux and OSX with Wine)
Arduino library
Notes for versions of the Arduino library
Version 1.0 – To set the asynchronously was need to edit the file “Theremino.CPP”
Version 1.1 – To set the asynchronously just add the call to setAsyncMode in the file “.INO”. – Read the comments on asynchronously in the README file located in “libraries/Theremino/src”
Version 1.2 – Asynchronously speed has increased to over 200 exchanges per second. Servo signals stability now is perfect even if you use the asynchronously.
Version 1.3 – The functions GenericRead16 and GenericRead24 do not interrupt the output through reinsertion. Some variables are now declared “volatile” and this could, in some cases, increase the stability of operation.
Version 1.4 – The ways “Async and “Polling” are easily selectable from ArduHAL application without having to change the firmware and recompile it. The way “Polling” allows you to use all sorts of Arduino with the FT232 chip.
Version 1.5 – The library “theremino” now located at the top level of the ZIP file and you can add it with the command “Add library from file. ZIP”.
Version 1.6 – Starting with version 1.6, the pins are configured as UNUSED are left as they are. Previously were set as “INPUT”, and this prevented from using them as output in the loop of Arduino.
Version 1.7 – Added the ability to read and also write the floating point numbers (float), with genericReadFloat and instructions genericWriteFloat.
Version 1.8 – Solved a small but annoying problem. In some cases the Arduino was not recognized because the EEPROM contained the name of the form is too long.
Version 1.9 – The length of the name read by the EEPROM is limited to 16 characters. This corrects cases of new forms not being recognized. This solution is permanent and always works, On the other hand, the solution of the previous version only worked in some cases.
ADDING THE THEREMINO LIBRARY TO THE ARDUINO LIBRARIES
Add the library “theremino” Arduino libraries
– Download the zip “_Zip ArduinoLibrary_Theremino_V 1.5” and copy it to a convenient place, for example, “Documents”
– Open & #8217; Arduino IDE
– Open the menu “Sketch”, follow “#includes library” and choose “Add library from file. ZIP”
– Open the folder where you copied the ZIP them
– Select the file “_Zip ArduinoLibrary_Theremino_V 1.5”
– Press the button “Open”
UPDATING THE THEREMINO LIBRARY IN THE ARDUINO LIBRARIES
Replace the library “theremino” with a new version (first method)
– Browse to the location of the Arduino library folder with the menu “File / Settings”.
– Close the Arduino IDE
– Open the folder “libraries” Arduino and delete the folder “Theremino”
– Extract from the zip file to the folder “Theremino” and copy it in the folder “libraries”.
– Reopen the Arduino IDE.
Replace the library “theremino” with a new version (second method)
– Browse to the location of the Arduino library folder with the menu “File / Settings”.
– Delete the library “Theremino”.
– Add the library theremino from the ZIP file as follows.
USE LIBRARY FILES IN ARDUINO PROJECTS
WITHOUT ADDING IT TO THE ARDUINO LIBRARIES
This method allows you to create a folder with all the necessary files and has the advantage that you will be able to take the whole folder to another computer and compile the project without having to install your library on the new computer.
– Copy our CPP and H files to each project folder (next to the project's INO file).
– Change in the INO file from #includes <Theremino.h> (with angle brackets) to #includes “Theremino.h” (with double quotes).
DOWNLOAD THE LIBRARY VERSION 1.9
Starting with version 1.6, the pins are configured as UNUSED are left as they are.
Previously were set as “INPUT”, and this prevented from using them as output in the loop of Arduino.
Starting with version 1.7, you can also transfer floating point numbers (float).
Read the pages on Pin “generics” nei file di HEL
The versions 1.8 and 1.9 solve a small but annoying problem.
In some cases the Arduino was not recognized because the EEPROM contained the name of the form is too long.
Arduino library – Version 1.9
ArduinoLibrary_Theremino_V1.9.zip (read the documentation of ArduHAL)
CHANGE OF COLORS’ Arduino IDE
The colors of the report of the official Arduino IDE compilation are dark red on black,
the following utility turns them into normal colors and easy to read.
(you can only change the colors for IDE versions 1.xxx)
Small executable program for correcting the color Arduino IDE
ArduinoIDE_ChangeColors.zip
INSTRUCTIONS
1) Open the ZIP file containing the “ArduinoIDE_ChangeColors.exe”
2) Copy the file “ArduinoIDE_ChangeColors.exe” close the file “arduino.exe”
3) Tap the file “ArduinoIDE_ChangeColors.exe” Right mouse button
4) From the menu that opened with the right key, to choose “Run as administrator”
5) Restart ArduinoIDE
CHANGE OF COLORS’ ARDUINO IDE WITH Theremino_ArduHelper
From version 2.7 onwards of Theremino_ArduHAL
you will also find in the ZIP the application Theremino_ArduHelper
and you can use it to do the same operation as the previous ChangeColors.
(you can only change the colors for IDE versions 1.xxx)
IotHAL – Communicating via radio with IotModule (ESP32)
The IotHAL connects the IotModule with high-level software, via WiFi and network.
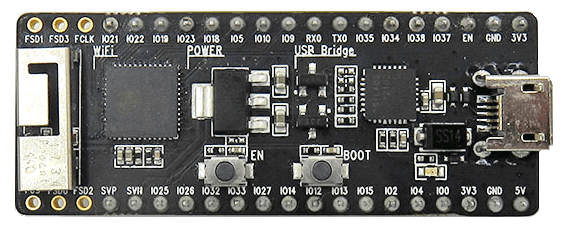
The I.O.T acronyms. IotModule of going to “Internet Of Things”. And these modules, programmable with the same IDE Arduino, They are truly versatile.
Here are their characteristics:
– Immediate management of the Input-Output, as always with the system Theremino.
– significantly more power (240 MHz clock against 16 MHz of the Master).
– Dual-Core Processor 32 bit (against the 16 bit dei Master).
– Support for fast operations on floating point numbers Single and Double.
– Operation via WiFi
– Easy to program them to read special sensors
– Programmable with the same IDE di Arduino (Note 1)
– Ability to use the same firmware and Arduino libraries
(Note 1)
Please read the previous paragraph to change the colors of the lower zone of Arduino,
from an illegible dark red on black, normal color and easy to read.
– Number of considerably greater Pin (28 against the 12 current)
– 8 ADC inputs 12 bit (14 oversampled) against the 10 bit current (12 overload.)
– 2 DAC outputs 8 bit
– 10 capacitive inputs
– 16 uscite PWM
– 3 SPI interfaces
– 3 UART interfaces
– 2 I2C interfaces
– 2 I2S interfaces
– 4 timers a 64 bit
– Integrated Flash Memory
– 520 Kbyte data cache
– 4 Mega Byte Program (flash)
– Possibility of connecting the module Theremino ADC24
– Cost of even minor forms of current Master.
Open chance not achievable with the Master, for example, place a room at ions or a hard-to-reach locations with geiger in a signal cable. Or build vehicles controlled via Wifi, as seen in the video Mars mission.
– – – – – – –
In this image you see the IOT HAL ESP32 connected to a module that has been configured with the maximum possible number of Pin.
I am well 64 PIN, but they use it less you can reconfigure the module to use and see only those who serve. At times even a single Pin.
All these Pin is transferred via WiFi, with a single exchange and the transfer time it is practically the same for any number of Pin.
Click in the image to enlarge.
– – – – – – –
The indication Rep Freq. (FPS) Valori approximate indica. The measured values are quite right around 200 fps and become increasingly incorrect (by default, and very), FPS as you grow and approach 1000. Do not modify the calculations because now we are all used for years in these indications and change would create too much confusion. However, for all automation uses and reading of a repeat sensors higher 100 FPS is always enough.
– – – – – – –
– – – – – – –
- Pins with the IN label can be programmed as : DigIn, Counter, Period e Encoder.
- The Pins with the IN OUT label can also be programmed as : Digout, Pwm e Servo.
- The Pins with the DAC label give an output voltage adjustable from 0 to 3.3 volts.
- Pins with the word ADC deleted could be used as ADC, but only by communicating via USB and deactivating the WiFi communication (in current versions it cannot be done).
- The Pins “0”, “1”, “2”, “3” and “12” they can only be used with special attention, otherwise the module will no longer work well. See next page: Connect the special pins.
The Pins can be configured with the following types:
– Digital output
– PWM Output (from 0.02 Hz to 40 MHz)
– DAC output (adjustable output voltage)
– Output for Servo-controls
– Exit for Stepper Motors
– Digital input
– Count input, frequency and period
– Input for two / four phase encoders
– ADC input for switches and transducers
– CAP input for capacitive buttons
– Adc24
Download the most up-to-date documentation files (23/03/2024)
Theremino_IotHAL_Help_ITA.pdf
Theremino_IotHAL_Help_ENG.pdf
Theremino_IotHAL_Reading_I2C_Sensors_ITA.pdf
Theremino_IotHAL_Reading_I2C_Sensors_ENG.pdf
Original documentation file in ODT format (23/03/2024)
IotHAL_Docs_ODT.zip
Get the modules already programmed
Lello (maxtheremino seller on ebay) can provide you with pre-programmed modules and can help you make them work in all ways (Softap, Station DHCP and Static Station) .
eBay maxtheremino
Mail Lello (ufficiotecnico@spray3d.it)
Download del firmware
Version 140
First published version.
It contained a defect that prevented the operation in SofTap so on almost all devices.
Version 144
With this version the SofTap so it works on all N-type devices, B and also G, with either 20 that with 40 MHz bandwidth.
Version 182
The most important are the Stepper motors.
>>> READ THE DOCUMENTATION FILE <<<
The main novelty of the version 182 They are on the following pages:
Resistors for PWM (page 16 and 30)
Pulldown for stepper in the documentation (once 17)
Warnings for VPN as docs SlosOverNet (once 66)
Automatic reconnection (once 13)
Debuggare con Generic Write (once 43)
Allocation PWM / Stepper / Servant (once. 27)
SSID and Password list (once. 59)
Version 191
See the last few pages of the new documentation.
In the file “zip” you'll find six folders.
– The basic firmware folder “IotModule”
– The five other folders contain the specific firmware for I2C sensors
Download the firmware version IotModule 191
See the last few pages of the new documentation
To program the module read the documentation.
IF IT DOESN'T FILL IN, READ THIS MESSAGE
For those who have problems with the firmware compilation for the IOT Modules
with the Arduino IDE (1.8.19), you have to check in the IDE: Instruments-> Card-> Card Manager, look for ESP32 by Espressif Systems that the installed version is the 1.0.6.
The versions 2.0.10 and 2.0.11 block compilation.
If one of these two versions is installed, Just select the version 1.0.6
in the drop-down menu of the Card Manager and install it. No need to restart the IDE.
(thanks to Giacomo Rucci for composing it)
Download the application IotHAL
Version 1.1
This is the first version but we controlled for a long time and also includes the complete management dell'Adc24.
Configurations are improved and can be configured in many ways in Setup.h file.
Version 1.3
to use the new firmware version V182
The most important are the Stepper motors.
>>> READ THE DOCUMENTATION <<<
Version 1.4
This version automatically reloads the file “SlotNames.txt” when modified by an external application (usually SignalScope, SlotViewer o Notepad).
Version 1.5
– Recognizes Communications-options Names even with lowercase uppercase letters.
– Works even with ADC values equal to zero.
Version 2.6
– Now all IotHAL applications, NetHAL and ArduHAL have the same version 2.6
– The version 2.6 Recognizes new commands via Text Slots, read the documentation.
Download the application Theremino IotHAL Version 2.6
Theremino_IotHAL_V2.6
Theremino_IotHAL_V2.6_WithSources (for programmers)
For all systems from Windows XP to Windows 10, both 32 which in 64 bit (Linux and OSX with Wine)
NetHAL – Communicate by radio with NetModule
The NetHAL connects the NetModule high-level software, via WiFi and network.
Open chance not achievable with the Master, for example, place a room at ions or a hard-to-reach locations with geiger in a signal cable. Or build vehicles controlled via Wifi, as seen in the video Mars mission.
The indication Rep Freq. (FPS) Valori approximate indica. The measured values are quite right around 200 fps and become increasingly incorrect (by default, and very), FPS as you grow and approach 1000. We do not modify the read function because now we are all used for years to his instructions and change would create too much confusion. However, for all automation uses and reading of a repeat sensors higher 100 FPS is always enough.
– – – – – – –
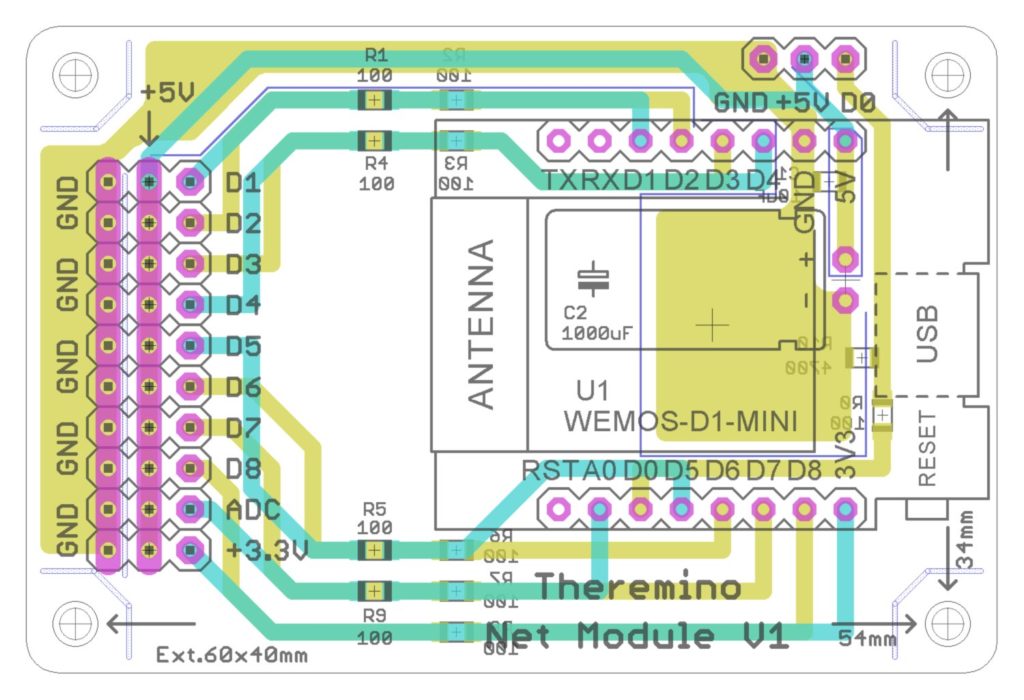
The design of the PCB of NetModule, It also includes 3D images and diagrams of the NetModule and WemosD1 mini, I download it with this link:
NetModuleV1.zip
– – – – – – –
– ATTENTION –
If you use a form Wemos D1 mini, without the printed circuit of NetModule,
You must add a resistor from 4.7 k between D0 and mass,
otherwise the form would take place always SoftAP.
– ATTENTION –
Our firmware has no relation with what is on the net
for the ESP8266 (NodeMcu, LUA, Arduino, Zbasic, Python and the like).
We wrote from scratch the firmware according to the manufacturer's specifications ExpressIf,
so all you read on the net about the ESP8266 is useless and misleading.
– ATTENTION –
If the module connects, but it does not appear in the lists of NetHAL and NetModuleProgrammer,
or the operating system does not create a COM port when you connect it to the USB port,
follow the advice of the last page of the document Theremino_NetHAL_Help_ITA.pdf
(the document must be at least 26 January 2018
otherwise reset your browser's cache and riscaricatelo)
– – – – – – –
Special thanks to Fabrizio,
without him all this would not have been possible.
– – – – – – –
The firmware and software are finished and operating at 100%. The documentation is almost complete and the hardware components are already available on eBay.
Lello (maxtheremino seller on ebay) can provide you with pre-programmed modules and can help you make them work in all ways (Softap, Station DHCP and Static Station) .
eBay maxtheremino
Mail Lello (ufficiotecnico@spray3d.it)
The documentation is nearly complete, pubblicheremo ancora un file di aiuto per chi avesse difficoltà con il Firewall.
![]() Download the most up-to-date documentation files (23-03-2024)
Download the most up-to-date documentation files (23-03-2024)
Theremino_NetHAL_Help_ITA.pdf
Theremino_NetModuleFeatures_ITA.pdf
Theremino_NetModuleProgrammer_Help_ITA.pdf
Theremino_NetModule_UsbProgramming_ITA.PDF Theremino_NetModule_FirewallProblems_ITA.pdf
(to download the latest versions may need to clear your Browser's cache)
![]() Documentation files, the most up-to-date downloads (23-03-2024)
Documentation files, the most up-to-date downloads (23-03-2024)
Theremino_NetHAL_Help_ENG.pdf
Theremino_NetModuleFeatures_ENG.pdf
Theremino_NetModuleProgrammer_Help_ENG.pdf
Theremino_NetModule_UsbProgramming_ENG.pdf Theremino_NetModule_FirewallProblems_ENG.pdf
(to download the last versions sometimes could be necessary to clear the browser cache)
![]()
![]() Original documents in ODT format (23-03-2024)
Original documents in ODT format (23-03-2024)
Theremino_NetModules_Docs.zip
Notes for versions of the NetHAL
Version 1.0 – This was the first published version, still lacked the ability to use static IP and to program the firmware via radio..
Version 1.3 – Fixed IP, DHCP, AP software and firmware programming via radio. Fully functional. Just missing the documentation.
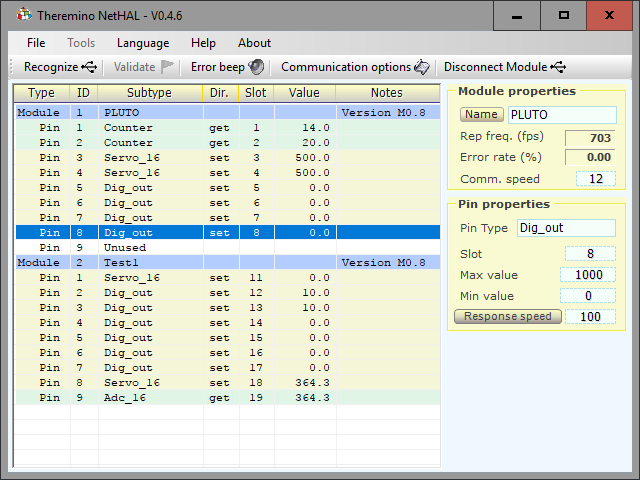
Version 1.4 – In some cases the forms were listed twice, resulting error messages (as you can see in this picture). The version 1.4 delete this problem.
Version 1.5 – The names that appear in the Firewall now begin with Theremino and so it's easier to find them. Those who have already used earlier versions might find the old names in your firewall, for example, “Hardware Abstraction Layer for NET and INTERNET” in place of “Theremino NetHAL”. The only way to convince Windows to use the new names is open RegEdit, look for the old string and delete it.
Version 2.0
Added antialiasing in oscilloscope !!!
Added Min and Max to the oscilloscope settings!!!
Deleted ListView flicker !!!
Added Chinese and Portuguese languages menu
Added SHIFT and CTRL on TextBox
– Up/Down = +/-1
– Pageup/PageDown = +/-10
– Shift = *100
– CTRL = *10
– ALT = /10
Deletes the column K.
Centered text in list titles
Increased reliability of Save-Load the configuration
Version 2.1
Correct commands “Configuration backup” that were not working properly.
Improved commands that you send in the “Command slots”, and the answers that you can get.
Now applications can learn the number of forms that have been recognized
and also to know if one of them stops working.
For more information read the pages 10 and 11 HELP file updated (Italian and English).
Version 2.2
I tipi in Pin Servo8, Servo16, Pwm8, Pwm16 and PwmFast now start in Sleep
The zero slot is reserved for commands and messages, so you can not assign it to Pin by mistake.
When you set a new name for the module, if the profile already exists you are warned.
The error was happening in some cases by assigning a new name.
The icon has improved. All applications of the system will have new icons, letters to distinguish them.
To see the text of the icons at the bottom bar of Windows, you must create links to applications, on the desktop.
Version 2.3
The icon has improved. All applications of the system will have new icons, letters to distinguish them.
The text of the icons at the bottom bar of Windows, It is also no visible link to the application, on the desktop.
Version 2.4
This version automatically reloads the file “SlotNames.txt” when modified by an external application (usually SignalScope, SlotViewer o Notepad).
Version 2.6
– Now all IotHAL applications, NetHAL and ArduHAL have the same version 2.6
– The version 2.6 Recognizes new commands via Text Slots, read the documentation.
Download the application Theremino NetHAL Version 2.6
Theremino_NetHAL_V2.6
Theremino_NetHAL_V2.6_WithSources (for programmers)
For all systems from Windows XP to Windows 10, both 32 which in 64 bit (Linux and OSX with Wine)
Notes for versions of NetModule programmer:
Version 1.0 – Fully functional. It also contains the files to be used with the USB programmer for the first programming (at the factory). Just missing the documentation.
Version 1.1 – The names that appear in the Firewall now begin with Theremino and so it's easier to find them. Those who have already used earlier versions might find the old names in your firewall, for example, “Hardware Abstraction Layer for NET and INTERNET” in place of “Theremino NetHAL”. The only way to convince Windows to use the new names is open RegEdit, look for the old string and delete it.
Version 1.2
The icon has improved. All applications of the system will have new icons, letters to distinguish them.
To see the text of the icons at the bottom bar of Windows, you must create links to applications, on the desktop.
Download the application Theremino NetModuleProgrammer Version 1.2
theremino_netmoduleprogrammer_v1.2
Theremino_NetModuleProgrammer_V1.2_WithSources (for programmers)
For all systems from Windows XP to Windows 10, both 32 which in 64 bit (Linux and OSX with Wine)
This firmware does not need to use the NetModule – Don't download it –
Might be useful only to those who think to improve our implementation. Who is going to be present to do so should also consider that any changes must be coordinated with the NetHAL application and documentation.
Download source code to recompile the firmware to Wemos D1 mini and compatible
MasterESP8266 (0.14B1).zip
Sending commands to HALs via TextSlots
The new versions of all HALs, from March 2000 2024, they also accept commands sent through Text Slots. And with Text-Slots you can do it all. Please read the HELP file.
Everything you can do with the mouse on the configuration panels can now also be done with these commands.
Use the CommandsToHAL program with Automation to try out commands. You can find it in the folder “ProgramsDemo ProgramsSlotText Commands” of the latest versions of Automation published since April 2024 onwards. Or download it with This link.
We also leave the following commands through the Number Slots for backward compatibility and because they are more efficient in some cases. We recommend using Number Slots only to quickly read the number of connected Hardware Modules. Please read the HELP file.
Send commands to the HAL
In the HAL applications instruction file explains how to use the “command Slot”. normally “command Slot” is zero Slot, to change it you should manually change the HAL initialization file.
The HAL applications written in the command slot the following numbers:
-1 ----------------- Il comando “Riconosci” è ancora in esecuzione0 ----------------- Non sono stati trovati Master, la lista dei Master è vuotaDa 1 in su ----------- Il numero di Master che sono stati riconosciutiNAN_MasterError --- Uno dei Master collegati ha smesso di comunicare
Other applications of the system can send commands to the HAL in writing the number NAN command Slot (not a number) corresponding. For application that can not write NAN numbers, there are alternative methods described in the instruction file. The commands are currently implemented “You acknowledge” and “Calibra”. For more details refer to the instructions of the HAL file.
Example of automatic reconnection of Master
The following example shows how a VBNET application can recognize that a Master has disconnected and then send the command “You acknowledge” to reconnect.
Private Sub tmer1_Tick(ByVal sender As System.Object, ByVal e As System.EventArgs) Handles tmer1.Tick
If Slots.ReadSlot_NoNan(0) < 1 Then
Slots.WriteSlot(0, NAN_Recognize)
Threading.Thread.Sleep(500)
End If
End Sub
This piece of code is called by a timer (usually each 100 mS). The first conditional statement If Slots.ReadSlot_NoNan(0) < 1 Then It reads zero slot and run the following lines if there is at least one connected and working Master.
The command ReadSlot_NoNan eliminates any error codes and turns them into zero. For which, if one or more Master are in operation, We will read their numbers, whereas if there was an error we will read fewer, or zero.
So if our application using more than one Master we will have to write their numbers. For example in the case of three write Master If Slots.ReadSlot_NoNan(0) < 3 Then
If the number of connected Master is less than the required number of Master, then the line Slots.WriteSlot sends the command “You acknowledge” and then the line Threading.Thread.Sleep(500) waits half a second, to give time to all the Master to respond (though several may have to stretch this time).
The file SlotNames.txt
The application HAL (from version 5.5 onwards) and the SlotViewer (from version 2.6 onwards), can also display the name of the Slot (or annotations or comments).
The names are written in a file, that should be called “SlotNames.txt”.
The file “SlotNames.txt” it is edited with NotePad, WordPad or directly from within HAL applications, IotHAL, NetHAL, SlotViewer e SignalScope. If the file “SlotNames.txt” There is no comment field will remain empty.
The posting rules are simple and are shown in the sample, located in the latest versions of HAL and SlotViewer.
Important to note that the names are not related to physical Pin, but the slots.
Each line of the file begins with the number of Slots, followed by a space and the text to be displayed. The line can also continue with a comment, that does not appear, preceded by a single quote.
The SlotViewer also uses the special commands Min = nn and Max = nn which indicate the range to be used for each single Slot. If the SlotNames file does not contain these commands then the Slot uses the values that are adjusted with the two boxes Min and Max of the SlotViewer.
If you want to use the same file of comments, both for the HAL and for the SlotViewer and the Signal Scope, you have to keep the files “SlotNames.txt”, “SlotViewer.exe”, “SignalScope.exe”, “HAL.exe”, all in the same folder.
Application modularity
The modular design of the software of the system Theremino you get, in an unconventional way, with running many applications. Each application handles only tasks for which it was designed and runs as smoothly as possible. In this way applications can be simple, efficient and with fewer defects. System Theremino many simple applications communicate with each other and work together to perform complex tasks.
Depending on your needs you can use two different methods:
– Isolated applications
– Groups of isolated applications
This does not mean that isolated applications cannot communicate with other. Modular communication is always possible and is done through the slots, that are shared for all applications.
To avoid using the same slot for different tasks we defined a main diagram.
Experimental 100 slots     000 - 099
- - -
Theremino_Theremin         100 - 199
Theremino_SlotsToMidi      200 - 349
Theremino_MidiToSlots      350 - 499
Theremino_MusicKeys        500 - 549
- - -
250 free slots             550 - 799
- - -
Theremino_OilMeter         800 - 809
Theremino_EEG              810 - 819
Theremino_Meteo            820 - 839
Theremino_Arm              840 - 849
10 free slots              850 - 859
10 free slots              860 - 869
10 free slots              870 - 879
Theremino_EmotionMeter     880 - 889
Theremino_geiger           900 - 909
Theremino_Bridge           900 - 909
Theremino_GEO              910 - 919
Theremino_GeoPreampTester  920 - 929
Theremino_Radar            930 - 939
10 free slots              940 - 949
10 free slots              950 - 959
10 free slots              960 - 969
10 free slots              970 - 979
10 free slots              980 - 989
10 free slots              990 - 999
This scheme is only indicative. You can use the slots as desired, just the same PC do not use the same slot, for two different tasks. If you get it wrong it doesn't break anything, but data overlap with undefined results.
Isolated applications with private HAL
Some applications of the system Theremino launch a private copy of HAL, located in the same folder of the application. These private and HAL have settings and configurations, generally, are locked with key “Master Locks” so it must be connected only to their hardware modules. For more information read the instructions of HAL.
The applications for this configuration are applications with a precise task, such as: Theremino_geiger, Theremino_OilMeter, Theremino_Meteo, Theremino_Theremin, Theremino_Arm, Theremino_Geo and Theremino_EmotionMeter.
application groups Theremino startall
The application Theremino startall start all As applications “Theremino_xxx.exe” which are located next to the file “Theremino_StartALL.exe”, or folders that are located next to it, and in all their subfolders .
To build a “application group” It begins with a root folder (with the name of the project that you are creating) Inside the main folder, each application should have its own specific folder containing the executable, supporting files and subfolders. If you use multiple copies of the same application is good to add a final number folder names. As shown in the following example:
Folder: "Multiplayer"

      Folder: "ThereminoSoundPlayer_1"
            Folder: "Media"
            Application: "Theremino_SoundPlayer.exe"

      Folder: "ThereminoSoundPlayer_2"
            Folder: "Media"
            Application: "Theremino_SoundPlayer.exe"

      Folder: "ThereminoVideoPlayer_1"
            Folder: "Media"
            Folder: "Media2"
            Application: "Theremino_VideoPlayer.exe"

      Folder: "https://www.theremino.com/downloads/foundations"
            Application: "Theremino_Hal.exe"
            File: "Theremino_HAL_ConfigDatabase.txt"
            File: "Theremino_HAL_INI.txt"

      Folder: "Theremino_Helper"
            File: "CustomControlsLib.dll"
            Application: "Theremino_Helper.exe"

      File: "Theremino_StartALL.exe"
This is not the only possible structure, within the main folder you can create folders and subfolders at will. The only constraint is that the Theremino_StartALL.exe application must be in the root folder.
Groups of applications like this can also contain dozens of applications. When placed in separate folders, each application maintains its own settings, and even the window positions independently. You can even create multiple groups of applications and run them all at once, maintaining an adequate separation between applications and ensuring that each application communicates only with its sensors and its actuators. But at the same time you can also make them communicate all, or in groups, between them. To communicate using the slots, Learn how to make good use of the slots is critical.
The application “Theremino_StartALL” launches all group applications with just one click and also closes. You may want to create a desktop shortcut to “Theremino_StartALL.exe”.
To close all the applications that have been opened, use the cross that closes the StartALL application. Or alternatively you could press the middle mouse button.
The new version 1.1 she remembers which applications she had opened and only closes those she had opened herself. Previously it was used to close groups of applications “Theremino Helper” which closed all applications starting with “Theremino_” and that cluttered the screen. Now, however, everything is done, and even better, with one application.
The new version 1.2 does not open any EXE files that are located in the folders “Sources” and “obj”. So you can use the “With Sources” of our applications without also opening the files used by the compiler and debugger.
ATTENTION – If the button “Enable shut down windows” is enabled (that is, red in color), then after closing all applications the Windows operating system is also stopped.
In the folder “AppsToStart” We are already present two example applications: “SlotViewer” and “WaveGenerator”, so you can double click on StartALL.exe, and try it now its working.
Remember that our applications do not require installation, but after download you have to extract the ZIP file.
Theremino StartALL V1.2 Application
Theremino_StartALL_V1.2.zip
Theremino_StartALL_V1.2_WithSources.zip
For all Windows systems to 32 and 64 bit. For Raspberry Pi, Linux, Android and OSX, read the installation notes.
In the past years, instead of the application startall, we used the following script. The new application is best startall, but let's also this link, for those who prefer or was fond.
Script Theremino Starter
Start_ALL_Theremino_Apps
Theremino SlotViewer
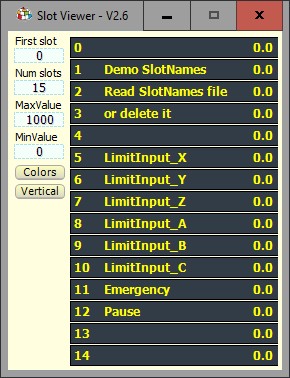
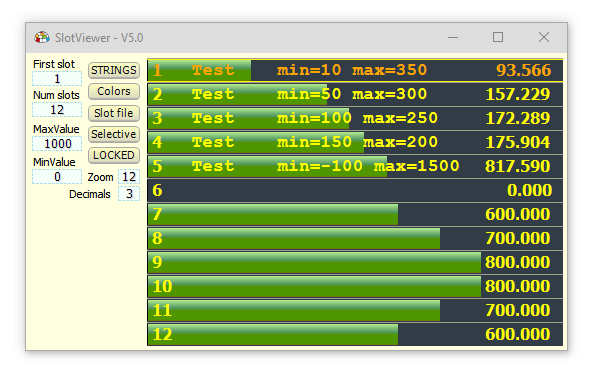
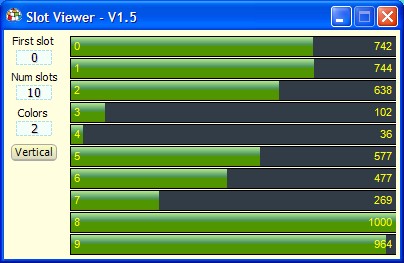
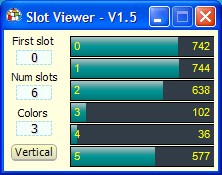
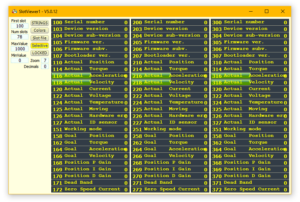
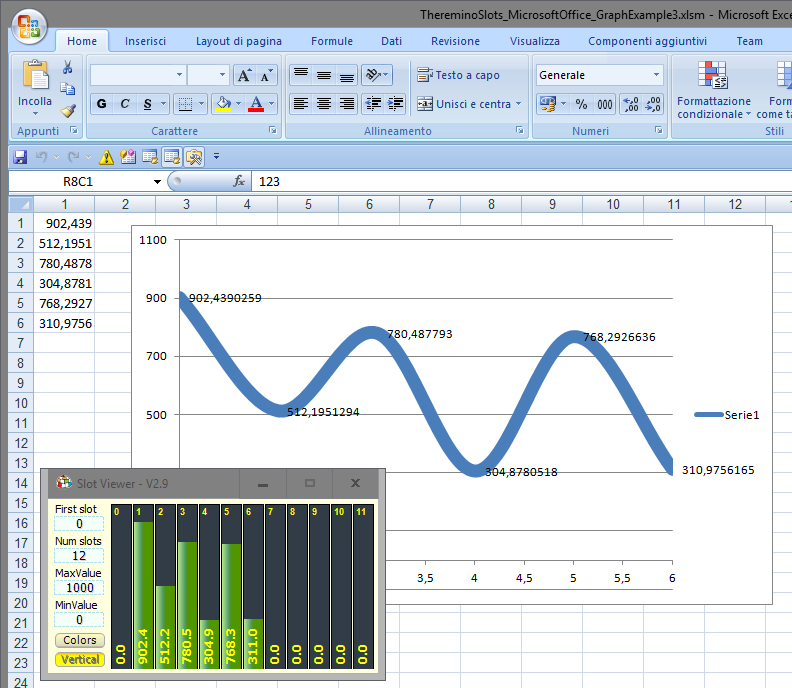
The slots are the heart's modular system Theremino. It is often convenient to keep an eye on their value or edit it manually. This small “Explorer of slots” is very flexible, can see the slots in various ways and dimensions, vertically or horizontally and with the color scheme of your choice.
You can view groups of any number of slots, even by selecting from different areas. You can edit the values with the mouse, arrow keys, PageUp, PageDown method. The CTRL and SHIFT keys allow you to change the values faster and you can also use the mouse wheel.
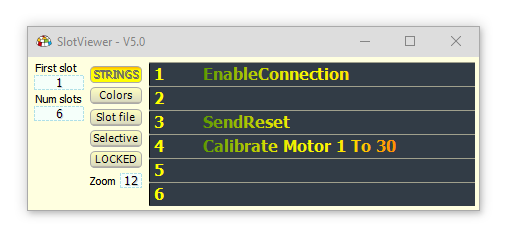
New versions can also view and edit text-slots
Instructions
- FirsSlot – The number of the first Slot to display.
- NumSlots – The number of Slots to display.
- MaxValue – Maximum value for all Slots that do not have the special command “Max”.
- MinValue – Minimum value for all Slots that do not have the special command “Min”.
- Strings – When this button is pressed (Orange) the SlotViewer acts on string slots.
- Colors – Change the display colors in three different ways.
- SlotFile – Opens the file “SlotNames.txt” to change it.
- Selective – When the button “Selective” is pressed, only the Slots containing a comment are displayed. In addition, they are also divided into groups on different vertical columns. This helps to keep the Slots tidy if you use them, for example,, More Engines (see This video on the Cobot application driving a robotic arm).
- Locked – When this button is pressed the whole application becomes read only. This way you avoid making changes by mistake.
- Zoom – Adjust the text size.
- Decimals – Number of decimal places to display.
- Rows each col. – Number of rows per column to display when using the “Selective”.
If you double-click on the title bar or use the square that is supposed to maximize the window, then the commands disappear or reappear.
The selected Slot is highlighted with a lighter box and red writing.
The first click on an unselected Slot does not change the value. To change it you have to make a second click or move the mouse.
By pressing the left mouse button on the Slot boxes and moving the pointer you can adjust the value between Min and Max.
Using the right button adjusts the value in about ten positions, normally the values are 0, 100, 200, 300, 400, 500, 600, 700, 800, 900, 1000, but if Min and Max are not worth it 0 and 1000, then these values are recalculated proportionally.
When using the right button you can increase the change step by ten times by holding down the SHIFT key, or you can reduce it by ten or a hundred times with the CTRL and ALT keys.
With the four arrows you can change the selected Slot and also the Slot value.
When changing the value of a Slot, either with the mouse or with the keyboard arrows, you can hold down the SHIFT keys, CTRL and ALT, which multiply the variations by one hundred, for ten or for a tenth.
The Selective Method
When the button “Selective” is pressed, only the Slots containing a comment are displayed.
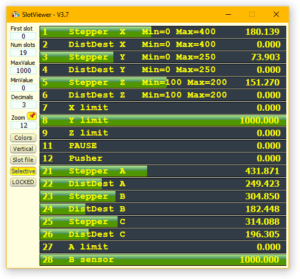
In this image you can see an example of the use of the “Selective” and vertical columns.
With “Selective” Slots are also divided into groups on different vertical columns. This helps to keep the Slots tidy if you use them, for example,, More Engines.
See also This video About the Theremino_Cobot Driving a Robotic Arm,
in the second half of the video you can see how the Slots have been organized in columns.
The SlotNames
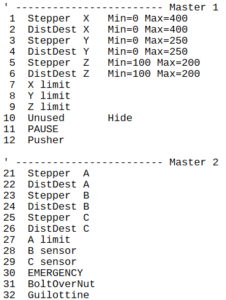
SlotNames file used as an example in these images:
SlotNamesExample
The SlotViewer also uses the comment file “SlotNames.txt”, with which you can give a name to each Slot and also indicate which is the minimum and maximum value to use.
The special commands Min = nn and Max = nn indicate the range to be used for each single Slot. If Min and Max are not suitable for a certain Slot, then the Slot uses the generic values that are adjusted with the two boxes Min and Max of the SlotViewer.
The command “Hide” hides the Slot in the way “Selective” even if there are comments for that Slot.
The command “End” concludes the SlotNames file and deactivates all the following lines.
If you don't want to see special commands in applications (SlotViewer, SignalScope e HAL) you can “to comment”, that is, you write a single quote before the part you don't want to display. The commands “commented” they are not displayed but continue to act.
Notes for versions
Version 1.6: In earlier versions the slot adjustment with keyboard arrows did not work well, now is in place.
Version 1.7: Changing “NUM slots” Sometimes it appeared a small white box, now no longer happens.
Version 1.8: Fixed small defects were born during the transition from XP to Windows7.
Version 1.9: Changes to work with Mono on Linux.
Version 2.0: Significant reduction in the consumption of CPU in order to facilitate the operation on Raspberry Pi.
Version 2.1: Changes for a better operation with multiple instances.
Version 2.3: Improved overall functioning and visibility of written. Now you can set the minimum and maximum (which were previously fixed at zero and a thousand). You can also use intervals with negative numbers (for example, from -1000 to +1000), or very small intervals (from zero to one), or very large (from – 100 000 to +100 000).
Version 2.4: Correct the size even on systems with font size changed both 125% which in 150%.
Version 2.5: Correct inaccuracies in the setting with the mouse and eliminated the flashes on startup. This version contains the new class “Slots”. New option to fine tune and quickly, with the up and down arrows, in combination with the ALT, SHIFT and CTRL.
Version 2.6: By popular demand we have also implemented the comments. For instructions read HERE.
Version 2.7: The “CustomControlsLib.DLL” has become part of the sources, so there is a problem at least for Linux and MacOsx.
Version 2.8: Improved alignment of comments.
Version 2.9: Added the display of non-message number “NAN_MasterError”. This is a mechanism that allows applications to automate guarantee that all masters are in operation. In case of malfunction or disconnection of one of Master the HAL issues a “NAN_MasterError” zero slot.
Version 3.0: Improved functionality of MaxValue and MinValue boxes. Now it doesn't happen more than the work to change them by writing the numbers with the keypad.
Version 3.1: Improved functionality of the spin boxes. You can use the CTRL, SHIFT and ALT keys to change the rate of change of numbers. And you can also use PageUp and PageDown which change the numbers of ten in ten.
Version 3.2: Improved error messages “Nomaster” and “Master Disconnected”
Version 3.4
– Now with regulation “Zoom” you can zoom in and out the application at will.
– With “Decimals” you can adjust the decimal places displayed.
– The variations with keys and with the mouse wheel are proportional to the scale (MaxValue – MinValue)
– If you use the right mouse button, the values are rounded to 1/10 of scale
– If over to the right key you hold down CTRL, the values are rounded to 1/100 of scale
– If over to the right Alt key is held, the values are rounded to 1/1000 of scale
Version 3.6
– The icon has improved. All applications of the system will have new icons, letters to distinguish them.
– Now you can keep multiple copies of SlotViewer (con nomi Theremino_SlotViewer1.exe …2.exe …3.exe) in the same folder, and each copy will use a separate initialization file.
Version 3.7
This version automatically reloads the file “SlotNames.txt” when modified by an external application (usually SignalScope, HAL or Notepad).
Those who have downloaded version 3.7 the day 01/12/2020 you would do well to download it again because we have updated the file “SlotNames” which now also contains examples of the special commands (remember before downloading to clear your browser cache).
Version 3.8
This version retains dimensions even by repeatedly closing it from minimized.
We corrected an error that in some rare cases, when editing values with the mouse, it jerked the value to maximum and threw the mouse cursor up, out of the application.
Version 3.9
The selected Slot is now highlighted with a lighter box and red lettering.
The first click on an unselected Slot does not change the value. To change it you have to make a second click or move the mouse.
Fixed an error with names greater than 999
Version 5.0
– The Slot Viewer can also display and act on string Slots.
– The way “Selective” it also allows you to organize the Slots into vertical groups of a hundred by a hundred.
Version 5.2
– Added the ability to change the number of rows for each column in the “Selective”.
Downloads from Theremino SlotViewer – Version 5.2
Theremino_SlotViewer_V5.2
Theremino_SlotViewer_V5.2_WithSources
For all Windows systems to 32 and 64 bit. For Raspberry Pi, Linux, Android and OSX, read the installation notes.
Theremino SlotsOverNet
For this application you have to thank Fabrizio, that it could make it easier thanks to its decades of experience on the networks, and now it makes available in OpenSource. If you want to write you can be found in This page.
Fabrizio Without this application would not exist. We did not think there could be such an effective solution, immediate and easy to use.
Until now, to communicate the values of the slots on the net, we had better not that OSC protocol and applications such as MaxMSP. Solutions such complex and difficult to understand, which in practice has never used any.
This application connects the multiple PC slots connected to the local network, even through WiFi.
No need for addresses and keywords. Just start an application on a computer (come Server) and another on a second computer (come Client).
Connect distant PCs, through the Internet it is only slightly more complex, you can use a VPN, as explained in the VPN documentation file, or you set the IP address and open the port in the firewall, as explained on page 13 of the instruction file.
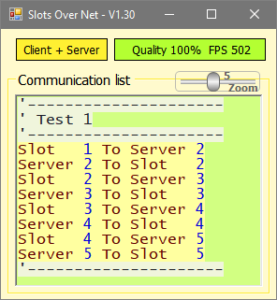
Then you write a few command lines, to transfer the values of the slot from one computer to another, and Slots are transferred all at once, up to 500 times per second.
Download documentation (27-11-2020)
Theremino_SlotsOverNet_ITA.pdf
Theremino_SlotsOverNet_ENG.pdf
Theremino_VpnHelp_ITA.pdf
Theremino_VpnHelp_ENG.pdf
Original documents in ODT format (27-11-2020)
Theremino_SlotsOverNet_Docs.zip
Notes for versions
Version 2.0
– The 2.0 It is the first published version. Before publishing this version we have written many tryouts, then 2.0 It is well tested and very reliable.
Version 2.1
– Now SlotsOverNet also works through the Internet. Read the instruction file.
Version 3.0
– Ora SlotsOverNet it also works over the Internet, either by using a VPN or by yourself. Read the instruction file.
Downloads di Theremino SlotsOverNet – Version 3.0
Theremino_SlotsOverNet_V3.0
Theremino_SlotsOverNet_V3.0_WithSources
For all Windows systems to 32 and 64 bit. For Raspberry Pi, Linux, Android and OSX, read the installation notes.
Theremino SignalScope
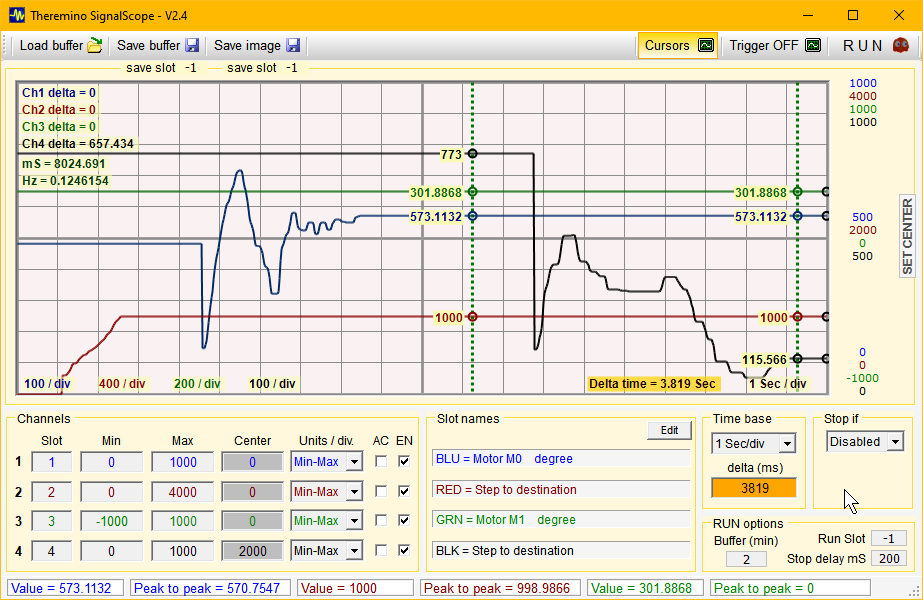
When the simple viewer of the HAL applications no longer enough, you can use this Signal Scope.
Attention: This is not an oscilloscope but Slot signals Viewer, they have a maximum resolution of a millisecond and then a maximum bandwidth (theoretical) by 500 Hz. In practice, however, the phenomenon of aliasing limit the range of frequencies to 100 Hz or so. If you want a true oscilloscope with 22 KHz of bandwidth and 192 KHz sampling download “Theremino DAA” from this page.
Signal Scope of Features:
- Storing signals Slot for the last 30 minutes maximum resolution.
- Ability to scroll backward signals (Delta time) to locate and zoom in on particular events.
- Two adjustable sliders with the mouse to measure widths, times and frequencies.
- Both the sliders that the delta time can be adjusted with the mouse and also with the TouchScreen.
- Continuous display of instantaneous values and peak-to-peak in the status bar.
- Ability to save and restore the event buffer.
- Ability to save images for documentation.
- Storing all functions and restore on reboot.
- Possibility to program the stop sampling after a number of events have occurred, by setting a threshold value and a counter.
Scope of Signal Features of version 2.2 onwards:
-
- Number of channels to be increased 2 to 4.
- The individual channels have a box to enable.
- Ability to duplicate the executable in the same folder Theremino_SignalScope1.exe / Theremino_SignalScope2.exe ecc.. , in this case each application will use its own initialization file, and then remember and will restore its configuration at startup.
- The new box “Clear buffer” It allows you to clear the buffer for each new acquisition, or to append new data to the existing buffer.
- New box “Run Slot” to start the RUN with the value of a slot (Zero = firm / Any other number = start).
- the adjustment “Stop delay” which delays the end of the acquisition, after that “Run slot” is back to zero (in some cases it is useful to capture the final events of the several).
- New automation to save the data buffer and the image when the value of a slot exceeds the 500 (the numbers of slots to be used are adjusted in the top two boxes, Right written “save slot”)
Scope of Signal Features of version 2.4 onwards:
- Buffer length adjustment from 1 to 60 minutes. This is a great improvement that allows you to see back in time as much as necessary without creating files that are too large and without slowing down the startup and closing of the application too much. Normally seeing back for a few minutes is more than enough, but if necessary you can stretch the buffer up to an hour. However don't set it too short, Go below the 5 minutes is of little use and keep in mind that the data files that are loaded and saved are truncated to the length of the current buffer.
- The DeltaTime is highlighted in orange and to reset it just double-click on the box.
- Ability to coexist multiple applications with SignalScope1.exe names, SignalScope2.exe, etc.. in the same folder. Each application uses a separate initialization file and will save data in separate Buffers and Images folders.
- Added date and time up to milliseconds in the display at each start of data logging.
- Fixed several minor bugs and improved general operation.
Scope of Signal Features of version 2.5 and 2.6 onwards:
- The SlotNames file is automatically reloaded when other applications modify it.
- By adjusting the Buffer (min) to zero, the Buffer is emptied at each new RUN
Recommendations:
- Enable “Trigger” only for fast repetitive signals, otherwise the display is very slow.
- Keep “Delta Time” zero if not in use, otherwise the signals do not appear immediately but only after the milliseconds set. Double clicking on the DeltaTime box resets it.
- Keep “Stop If” disabled if not in use, otherwise, sampling could stop unintentionally.
- Edit the file “Slot names” to give a meaningful name to its Slot.
- Copy the executable executable ’ ’ this application next to dell ’ HAL and Viewer share the same Slot “Slot Names”.
- Disable “Interpolate” quick on/off signal, that would otherwise be distorted.
- Adjust the buffer length to no more than ten minutes in order not to slow down the startup and closing of the application and not to create files that are too large.
Notes for versions
Version 1.2: This is the first published version.
Version 1.3: When the slot names Panel is visible only if space allows.
Version 1.4: The parameter “Delta” is reset each time you press “RUN” so you don't forget.
Version 1.5: Deleted the error in closing if the folder was missing “Buffers”.
Version 1.6: Deleted the error in closing if the RUN time was greater than the length of the buffer that stores the data. Extended storage buffer 24 hours. Beware that with very long buffer time to save loading can be quite long.
Version 1.7: If cursors are enabled then is saved only the area between the two sliders. The Trigger is greatly improved. Deletes a waveform instability happening randomly. The buffer is again limited to 1 now (for log Logger applications are used). Save and load buffer takes at most 2 seconds. The DeltaTime be changed quickly using CTRL and SHIFT + Mouse.
Version 1.8: Deleted error with very large input values.
Version 1.9: Added ability to disable interpolation that in some cases distorted signals. Deleted mistake by starting the application minimized.
Version 2.0: Fix error that occurred with Min = 0 and Max = 0.
Version 2.1: When starting the application, the Slot box is cleared. This eliminates the need to change its value by mistake, using the keyboard arrows. LATEST VERSION 2 CHANNELS
Version 2.2
– Number of channels to be increased 2 to 4.
– The individual channels have a box to enable.
– The new box “Clear buffer” It allows you to clear the buffer for each new acquisition, or to append new data to the existing buffer.
– Ability to use multiple copies of the same folder SignalScope, with names or Theremino_SignalScope1.exe 2 or 3,
in this case each application will use its own initialization file, and then will remember its configuration.
– New automation to start the RUN with the value of a slot (Zero = firm / Any other number = start)
– New automation to save the data buffer and image with the value of a slot (It acts surpassing the value 500)
Version 2.3
– Improved operation of the button “Clear buffer”
– The main window is brought to the foreground at any “Run” controlled by a Slot
Version 2.4
– Boxes Min, Max and Center which also accept numbers with decimals.
– The LastBuffer.csv file is created with a prefix that also contains the application number.
– The DeltaTime is highlighted in orange to avoid forgetting it active.
– Double clicking on the DeltaTime box resets the time.
– Fixed the defects of the StopDelay that sometimes did not work.
– The Buffers and Images folder change names if multiple SignalScopes are used (SgnalScope1.exe, SignalScope2.exe ecc…)
– At each new start of the acquisition the date is also shown, now, minutes, seconds and milliseconds.
– Now you can adjust the buffer length from 1 minute to 1 now.
Version 2.5
This version automatically reloads the file “SlotNames.txt” when modified by an external application (usually HAL, SlotViewer o Notepad).
Version 2.6
– We fixed a small bug in CSV files
– By setting the Buffer(min) to zero, the buffer is emptied at each new RUN
Version 2.7
– In previous versions there was an error that made it difficult to adjust the CenterPosition
Version 2.8
– New button “Time” in the top bar to delete vertical divisions over time.
– Units/div boxes. up to 5000000
Downloads Theremino SignalScope – Version 2.8
Theremino_SignalScope_V2.8
Theremino_SignalScope_V2.8_WithSources
Downloads Theremino SignalScope – Version 2.1 (latest version at 2 channels)
Theremino_SignalScope_V2.1
Theremino_SignalScope_V2.1_WithSources
For all Windows systems to 32 and 64 bit. For Raspberry Pi, Linux, Android and OSX, read the installation notes.
Easy access to slots with: “WriteSlot” and “ReadSlot”
To communicate with the Slots you call functions: “WriteSlot” and “ReadSlot” and their initialization functions.
Download: A very simple application to make the first experiments, you download from here:
https://www.theremino.com/downloads/notes-on-software#emptyapp
Download: Module_MemoryMappedFiles_VbNet_CSharp_Python_Pascal_VB6.zip
This file contains the BINDINGs (modules for VbNet, CSharp, Python, Pascal and VB6), for C++ refer to the examples of MemoryMappedFiles of the next section. If you need practical examples, almost all applications in the system Theremino using the functions WriteSlot and ReadSlot.
Download: Class_ThereminoSlots_VbNet_CSharp.zip
This is the new class to access the slots. This class is better than previous forms “Memorymappedfiles”, and will gradually be included, in all new versions of our applications. Includes only those versions VbNet and CSharp, then those who use other languages, must get by a little, and make a mix with previous versions. This class does not require initialization, you initialize alone when it instantiates an object Slots. Functions for accessing slots have become Slots Write() and Slots Read(). This class also includes the functions to create and compare numbers signaling NAN (operation that everyone said was impossible, We have searched the web for years and eventually the solution we had to invent from scratch)
Interprocess Communications and Memorymappedfiles
Communication via SLOT is based on the MemoryMappedFiles (Windows) and the SharedMemory (Linux). These examples explain how they work with data of all kinds.
For simple communication with the slots on the system Theremino, don't use these examples, but the more practical WriteSlot and ReadSlot, the previous chapter.
These examples also show how to use strings, integers, float a 64 bit arrays that are not needed to communicate with the system Theremino, but it might be useful to communicate efficiently (A few microseconds for each transfer) several programs created by users, even in languages different from each other.
The source code in C++, CSharp, VBNET and VB6, may be useful to non-Windows systems experts to do translations and experiments in various versions of Linux and Mac.
We recommend that you start the tests by launching multiple versions of these programs in different languages, or even all in the same language, and communication experiments by writing strings and numbers, sending them with and receiving them with GET
Communications in system Theremino, use numbers only “Single” (floating point in 32 bit), in positions 0 to 1000 (offset from 0 to 4000), the MemoryMappedFile with name Theremino1. Communication between applications, could also use files with different names from Theremino1 and not engage the slots on the system Theremino.
Download
Theremino_MemoryMappedFiles_V1.3
For all Windows systems to 32 and 64 bit. For Raspberry Pi, Linux, Android and OSX, read the installation notes.
Access Slots with Windows PowerShell
All Theremino system software reads and writes to Slots which are data shared between different applications. This feature allows for a great flexibility and intercommunication capabilities unique to the Theremino system.
Read more on these pages.
To have it in English or in your preferred language after opening the page press the right mouse button and choose “Translate to…”
We thank Emanuele Marano who provided this image, A great example of integration between various applications and that has found a way to access the Slots also from PowerShell.
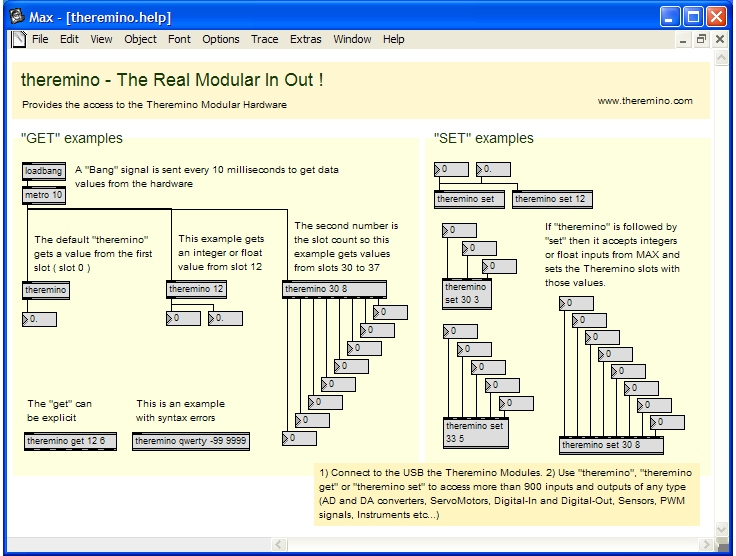
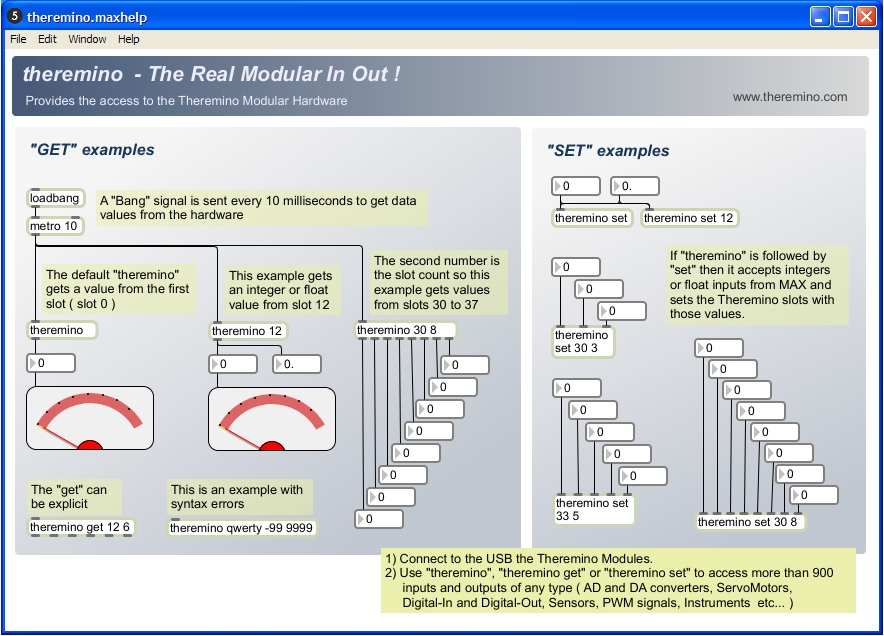
Software to communicate with Max/MSP
These are examples of bi-directional communication between the slots on the system Theremino and Max/MSP
Interactive help for Max/MSP version 4. x
Interactive help for Max/MSP version 5. x
Using a MXE (External module for MAX) you get extremely fast communication (direct calls to a DLL – A few microseconds for each transfer) Note that through the slots on the system Theremino multiple patches in Max/MSP can communicate with each other very efficiently this possibility might be useful to the makers of complex systems that, currently, for communication between Patches only have much slower methods. (We're not big experts from Max so if anyone knows other efficient methods we communicate and we will correct these notes)
Max Install
In this file all you need to communicate between Max/MSP with the slots and the MemoryMappedFiles system Theremino.
Theremino_Max_Installer_V 1.0
Theremino_Max_Sources_V 1.0 (version for programmers)
Using these sources you can recompile the patch Theremino.mxe. With the necessary changes, It should be possible also interface with PureData and similar programs (VVVV, Processing, Eyesweb, etc…)
For Linux and MAC this project should be changed both in the MemoryMappedFiles and in how to install the files in the folders of Max/MSP.
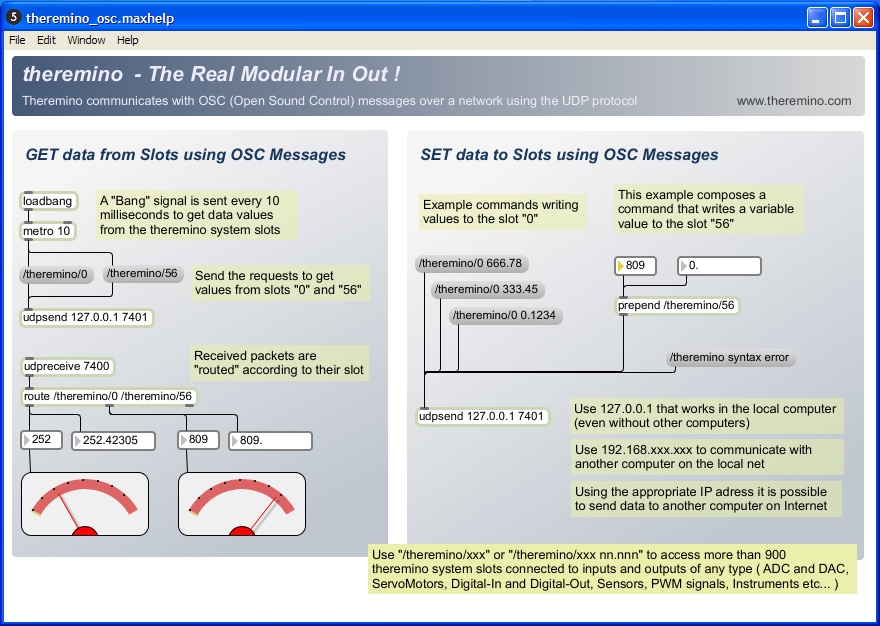
Software to communicate via UDP with OSC messages
This is an example of bi-directional communication between the slots on the system Theremino and the environment Max/MSP with the Open Sound Control Protocol
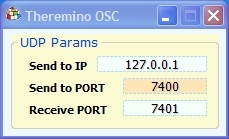
Help UDP communication interactive – OSC for Max/MSP version 5. xThis example shows a Max/MSP Patch that sends on UDP port 7401 the request slot values 0 and 56, receives UDP port 7400 and shows them with two VU-Meters.
The Theremino_OSC application receives requests UDP port 7401 and sends the values of slots on UDP port 7400
Application that implements access to slots system Theremino via UDP with OSC messages–
–
On the right side of the sample Patch view, with a similar proceeding, How to write numeric values into the slots of the system Theremino.
Communication options via UDP
OSC Protocol over UDP is slower compared to the previous method (with the DLL “External” by MAX, call MXE) but allows for a much more flexible communication, both on the local network or through the Internet
Through our Slots, ThereminoOSC, Max/MSP, Processing and PureData you can connect seemingly incompatible hardware and operating systems in an easy and immediate. Without writing a single line of code.
With a little experience in programming, you can also change our examples (all freeware and with complete sources) Our software is all written in an extremely simple and modular so you can be a base for the development of applications with special requirements.
Theremino OSC V 1.5 and sample Patch for Max/MSP
Theremino_OSC_V 1.5
Theremino_OSC_V 1.5 _WithSources
For all Windows systems to 32 and 64 bit. For Raspberry Pi, Linux, Android and OSX, read the installation notes.
Theremino Script
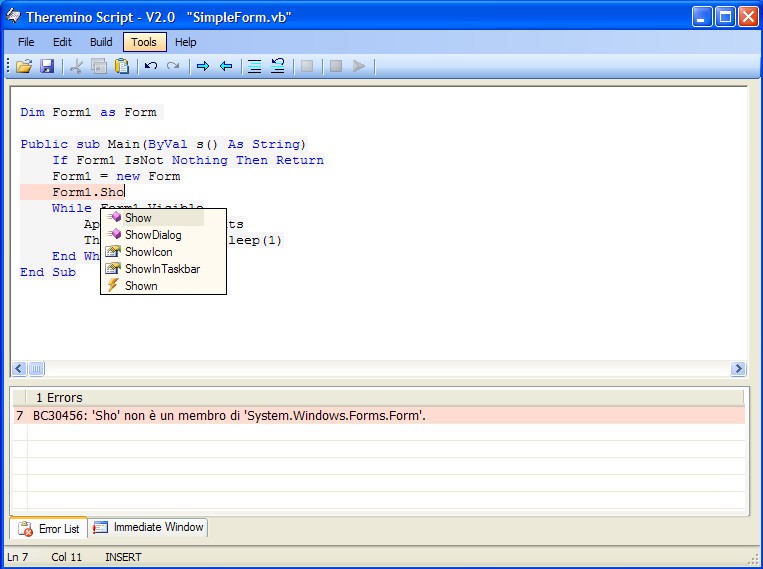
Theremino Script allows you to write small programs in VbNet or CSharp without installing VisualStudio.
This application uses temporary files in the TEMP folder,
which antivirus often misidentify as positive
and erase them, generating errors in the application.
So we recommend using directly Visual Studio (for experts),
or Theremino Automation which is easy to use.
The communication features and MemoryMappedFiles (Interprocess Communication) are implemented at the system level, so just write WriteSlot and ReadSlot to communicate efficiently (a few micro seconds) with the slots on the system Theremino.
The language is compiled and relies on DotNet for which execution is very fast (from our trials VbNet is faster than CSharp and C++), VbNet also has a set of mathematical functions and graphics absolutely complete.
Compiled programs are usable even without Theremino_Script and can be deployed as a regular file “EXE”.
The Theremino_Script is a little’ the younger son of Microsoft Visual Studio Express but it doesn't go quite as well, is slower, contain certainly more bugs and glitches and doesn't have the Visual editor of forms, for which the program you write everything in text. The only advantages are that you should not install Visual Studio Express and write a few lines looks, at the beginning, easier.
We recommend to use the real Visual Studio that you download from here: downloads/notes-on-software # instruments. Visual Studio allows you to easily continue even when programs become large. But many users have asked for an easy way to access to slots, System Theremino, to write things like “I turn on an led – I look forward to 10 seconds – I turn off the led”. So we tried to simplify and hide every complication. It is said that this route is valid, try it and let us know how you are.
If you are not comfortable with Theremino Script and you don't want to use Visual Studio, then another good solution, Max/Msp environments could be, PureData and Processing.
A language even simpler?
Theremino Automation: downloads/automation
Translate the examples to VbNet in C #
– From one of the examples in C # running
– Give it a new name and save it
– Take (with copy and paste) VbNet functions which you are interested
(even more features, but be careful controls and events, they are mistranslated)
– Translate with this utility: http://www.carlosag.net/Tools/CodeTranslator
– Or with this: http://www.developerfusion.com/tools/convert/vb-to-csharp
– And finally paste the translated code in C # application
Notes for versions
Version 2.1: First version of Theremino_Script with access to integrated SLOT.
Version 2.2: Improved suggestions (IntelliSense) they now have more choices.– The tips are selected by clicking on the list with a double mouse click.– Editing is easier and faster.– No longer happens accidentally choose work from list of suggestions.– Added a sample that simulates the clicks of a Geiger with variable frequency, useful to try the program Theremino_Geiger.
Version 2.3: The mouse wheel now scrolls so decent, fast and progressive.– Added an example that flashes an LED connected to “Slot 1”, useful for those who make their first steps with the slots, the Master and the Hal program.
Version 2.4:
– Complete access to slots is in VB which in c #
– The functions you call to access the slots are:
— WriteSlot(Slot, Value)
— ReadSlot(Slot)
— ReadSlot_WithNans(Slot)
– In VB calling MemoryMappedFile_Init is no longer needed (If you call does not give error).–
– In c # all the MemoryMappedFile initialization is no longer needed. You must delete all the rows in the initialization block, otherwise give errors.
– In c # the main class should no longer be called “class Script” but “partial class Script”
– CSharp lovers and for those who were accustomed to Arduino, We added the examples: Example1, Example2, Example3 Example4 and. These examples explain how to add buttons and text boxes and how to use their property and their events.
Version 2.5: Added the example “Temp Meter” in the folder “Theremino SLOT Examples”. Here he is seen as a function: https://www.youtube.com/watch?v=0erUqTAiixs
Version 2.6: Fixed many small defects were born during the transition from XP to Windows-7/8.
Version 2.7:
Added the menu “Files” “Open application folder”
The FileOpen dialog box in addition to opening the Vb and C # can also launch executable files.
The FileOpen dialog box are also permitted multiple selections, comfortable for moving and copying files.
The FileOpen dialog box does not create more problems in the case of multiple ThereminoScript in different folders.
Open the File menu now also contains the MOST RECENTLY USED list, with the recently used files.
Added the current language in Google searches, Bing and MSDN
SaveAs Panel full path made it hard to change the name, Now you see the name of the file without path.
The basic keywords are automatically converted, with uppercase and lowercase letters.
Version 2.8: Fixed small bugs and added many sample scripts.
Version 3.0: Improved the three examples WebBrowser that now open WEB pages with fewer errors. WebBrowser now also follow the links correctly, When they click on WEB pages.
Theremino Script downloads – Version 3.0
Theremino_Script_V 3.0
Theremino_Script_V 3.0 _WithSources (version for programmers)
For all Windows systems to 32 and 64 bit. For Raspberry Pi, Linux, Android and OSX, read the installation notes.
Theremino Office
Many know Excel and know how to use VBA (Visual Basic for Applications). You can write and read the Slot from VBA paves the way towards the economic management of sensors and actuators. Just a Master module that you can also build in DIY and you will get the same results that in the past required expensive National systems, MATHLAB or similar.
But most of all those who know VBA will appreciate the simplicity of this implementation, There are only two features, easy to remember, “WriteSlot” and “ReadSlot”. With these two functions accessing sensors, move servo motors, driving relays and Excel charts move externally controlled in real time.
The communication speed is great, to write or read a Slot with Libre Office and Open Office only takes 70 uS, While with Microsoft Office on your own or. 3 uS. This speed can actually be helpful because not only charts with VBA. You can do real applications even with heavy algorithms that need maximum efficiency.
Tips for programmers
 All the magic is in the form “ThereminoSlots” that should never be edited. This module exposes the two functions “WriteSlot” and “ReadSlot” that can be used in all modules, and macros in the document.
To get that all macros of all documents can use functions “WriteSlot” and “ReadSlot”, just copy the form “ThereminoSlots” in “My macros” or in “Office macros”
If you write in a cell while the macro activates Microsoft Excel tries to stop the macro (unpleasant behavior, Libreoffice and OpenOffice do not). If the macro contains a DoEvents and calls him very often when Microsoft Excel tries to stop the macro goes in error. The solution is to call DoEvents at regular times so as to advance the UI but not too often, Let's say every 30 Milliseconds.
Arduino
The system theremino connecting the Arduino modules directly with Excel (and with all the other applications System theremino). With the application ArduHAL You can read sensors, move engines or control temperatures, directly from Excel, or by other Office applications.
Download
Examples for Microsoft Office, Libre Office and Open Office:
Theremino_SlotsToOffice.zip
All the examples are in this zip file contains the module “ThereminoSlots” It is written so that we can work on Microsoft Office, Libre Office and Open Office without change even a comma.
ATTENTION – The new version of the. “ThereminoSlots” It also contains the numbers NANs that serve to communicate messages with l & #8217; HAL through the Slot zero. This version only works on Microsoft Office because on Libre Office and Open Office cannot initialize NAN numbers. Those who do not use Microsoft Office will have to do without the NAN and use the file “Theremino Slots” lying in & #8217; example “ThereminoSlots_LibreOffice_OpenOffice.ods”.
The same is not possible for samples for which we have prepared an example for LibreOffice and OpenOffice (with extension “ODS” and some examples for Microsoft Office (with extension “xlsm”).
In the ZIP file you will also find a text file with some explanations and a file “TestFunctions” with the features we've used to try the communication speed.
Theremino Buttons
This application is the fastest method provided by the system theremino to create control panels to use with your Mouse or with Touch Screen.
You don't need to know a programming language, just type the text you want to appear on the buttons and adjust some options. Everyone can quickly learn to create new buttons and text boxes. And change colors, the size and also arrange controls on one or more columns and rows.
Here are some examples of panels that can be created.
To edit the controls you hold down the CTRL key on your keyboard while you click with the left mouse button on a button or a button-free zone.
The following screen appears and its commands modify the controls, you change the text displayed, changing the colors and properties of writing and reading of the signals of the slots. You arrange your controls across multiple rows and columns, If they create new and delete.
The version 2.0 has greatly improved. You can also manually rearrange buttons, by dragging them with the mouse or use the arrow keys to resize with SHIFT. There are new types of movement and editor also allows you to do the Undo to go back when you are wrong. To discover all the news read the instructions.
Full instructions are in the documentation files.
Documentation in Italian and English
Theremino_Buttons_ITA.pdf
Theremino_Buttons_ENG.pdf
A sample app (rotational speed for internal combustion engines)
RpmMeter_ITA.pdf
RpmMeter_ENG.pdf
A sample app (a simple Rover) — UNDER CONSTRUCTION —
Theremino_Buttons_SimpleRover_ITA.pdf
Theremino_Buttons_SimpleRover_ENG.pdf
For an example of how you can drive a Rover watch video Mars mission.
For this video we used an old Smartphone transformed into camera WiFi using the App. Ip-Cam. Paying two or three euros the inscriptions are deleted and you can use it on three phones. To use the App. IP-Cam the SIM is not required.
A sample app (BrickRobot) — NOT updated to V 2.1 —
This example shows how to compose a complete environment composed of multiple applications of the system, start them together with “Start_ALL.vbs” and close all of them, together with the middle mouse button (Thanks to the Helper application).
Theremino_Buttons_V2.0_BrickRobot.zip
In this video you can see the moving BrickRobot. Note that anyone can add buttons and servo motors. You can also easily change the movements just change the destinations in the buttons. All without programming a single line of software. https://www.theremino.com/files/BrickRobot2.mp4
Notes for versions
Version 2.2
Added the name of the uploaded file in the title bar.
Pulse type is changed, with Speed = zero it behaves ON/OFF, with Speed from 1 up you have a pulse lasting Speed in milliseconds”
Attention that since version 2.2 on the type “Pulse” has changed:
– With Speed equal to zero, It has an ON/OFF behavior,
– With Speed from 1 up, It has a pulse lasting Speed in milliseconds”
Downloads of Theremino Buttons – Version 2.2
Theremino_Buttons_V2.2.zip
Theremino_Buttons_V2.2_WithSources.zip (version for programmers)
For all Windows systems to 32 and 64 bit (for Raspberry Pi, Linux, Android and OSX, read the installation notes.
Theremino SimpleLogger (with Theremino Script)
This is a sample script Theremino Script. Use it only as an example and as a test of Viewer KST. To build a data logger you should use the Theremino Logger that is found in the next chapter.
Even the less programming expertise can adapt this script to their needs. The LOG.csv file is created in the same folder that contains programs “exe”. By changing the first four lines of the file “ThereminoLogger. vb” You can vary the range of acquisition and channels to be scanned. Once edited at will, You can launch directly the compiled version “ThereminoLogger.exe”, no more having to “ThereminoScript”.
– Notes for the new version –
There are some examples of interactive viewing with KST. To use KST first of all you have to install it from the WEB and then proceed as described in the file “Readme – KST Install Notes.rtf”
We have also added the compiled versions (exe), so you should not even open Theremino Script to compile them. The three precompiled versions logging every second, ten times per second and one hundred times per second.
KST files allow you to view logs in various ways, While you are logging. They're just examples. With patience and enquiring on the WEB you can make KST every kind of view and filter. Probably you can also use the WEB to send MySql file KST. Use KST is not easy at all, is a great software and the great results you must pay with a lot of patience.
– Fix –
We moved the files to the same folder as the LOG.csv KST. It seems that KST had a defect that prevents him from reading the LOG if it is in a different folder. If you have not downloaded this latest version manually move them out close to the LOG.csv.
– – – – – –
Downloads of Theremino SimpleLogger – Version 2.0
Theremino_SimpleLogger_With_KST_Examples_V 2.0
For all Windows systems to 32 and 64 bit. For Raspberry Pi, Linux, Android and OSX, read the installation notes.
– – – – – –
Theremino SimpleLogger – Version 3.0
The script Theremino Logger is changed in version 3.0, to collect data from some weather sensors. The version 3 Converts values from 0 to 1000, in temperatures, UV index, Millivolt and Volt and you download from here:
https://www.theremino.com/hardware/inputs/meteorology-sensors#logger
Theremino Logger
This Datalogger and simple to use but with great performance. The base, concise and intuitive, has been studied by Marco Russiani. Then we supplemented with calculations to measure resistances and temperatures, with the PT100, Pt500 and PT1000 three or four wires.
The temperature calculation from the resistance of Platinum resistors (PTxxx) is done by means of a polynomial formula, with an average absolute error of 0.015% throughout the temperature range, from -200° to +850° C.
Are also implemented the calculations for probes:
- Lm35 – From 0° C to 150° C with an accuracy of +/-0.5° C)
- TSIC501 – From -10° C to 60° C with an accuracy of +/-0.2° C
- UVM-30A – UV index from 0 to 11
- ML8511 – UV from 0 to 15 MW
For probes LM35, TSIC501, UVM-30A and ML8511 might be enough a Theremino Master. But for high precision measurements and especially for RTD (PT100 and 1000) It is good Add a Theremino Adc24.
Learn more about sensors in These paginand and in Adc24 documentation.
 A Datalogger controllable via radio
With the Theremino Logger on a Tablet TCU you get a system similar to these without spending thousands of dollars. The result is a complete datalogger controllable via radio, You can store data for years, consuming only 2 Watts (less than 500 but to 5 Volts). The complete system can be enclosed in a watertight container, without ever needing to open it. The radio is controlled via TeamViewer and your data is accessible on your local network, through Windows folders.
Mini Instructions
- The Log file is written next to the executable and can be viewed with KST (as explained in the previous “Theremino Simple Logger”). Currently the only one who knows well enough KST is Marco Russiani, If you have trouble configuring it let him know.
- The sampling interval can be very frequent (currently the maximum is 60 samples per second) but under the second you do not have a great precision and get tired enough the CPU. To reduce the work to the CPU is good to keep the application minimized.
- Each line of LOG (also presented in the second row of the application), consists of the date, followed by the Julian date (in days and fractions) and followed by the values of the sensors are enabled. The field separator is a semicolon.
- The line “Value” view individual sensor readings. See them in real time is useful in trials.
- In row “Slot” you set the slots for individual sensors. These numbers must correspond to the numbers of slots that you set in the HAL.
- In row “Type” you set the sensor type.
- In row “Multiply” you set the multiplication factor, for fine adjustment of the gain (the slope of the calibration curve). Normally this value is “1”. See the schematic Adc24 documentation.
- In row “Trim value” you set the factor of addition, for fine adjustment of final value (you move the calibration curve up or down).
- The new buttons “Zero set” We are from version 3.3 onwards to the “Tara” easily. Mostly it is used for linear transducers and load cells. Using them is easy, moves the sensor in the zero position and the button is pressed.
Special notes for channels with the types “RES-3” or “Res-4” or “PTxxx”
- With these types using two Slots.
- The first Slot is written in the line box “Slot” (for example, 10).
- The second Slot is the Slot following (for example, 11).
- The first slot is the voltage value measured.
- The second Slot is the value of the measured current divided by the current measuring resistor (normally 10 k).
- In row “Multiply” do not set “1”, as with other sensors, but you set the value of the current measurement resistor (usually 10000).
Display data with KST
KST is a great OpenSource Viewer for LOG files. View log files in real time, While they are written, as shown in This video.
KST also supports huge files and displays them and filters in every possible way. It is also very easy zoom and browse the files in the past. The perfect solution for all needs scientific logging. With patience, enquiring on the Web and possibly asking for help in Marco Russiani, You can make all kinds of visualization KST. Probably you can also use it to send files MySql on WEB. Use KST is not easy at all, is a great software and the great results you must pay with patience.
Download documentation on KST prepared by Marco Russiani
KST2_Help_for_Theremino_Logger_ENG.pdf
Theremino Logger downloads – Version 3.4
Theremino_Logger_V3.4.zip
Theremino_Logger_V3.4_WithSources.zip (version for programmers)
For all Windows systems to 32 and 64 bit (for Raspberry Pi, Linux, Android and OSX, read the installation notes.
Theremino Logger12, Logger24 and LoggerNN
Three new data loggers with many new commands.
The LoggerNN has fewer commands, but on the other hand it can log a number of channels varying from 1 to 99.
All three loggers can write all channels up to a thousand times per second, but be aware that on slow PCs they may put too much strain on the processor. And also be careful that when you set a thousand writes per second ( Recording interval = 0.001 ) Files quickly become very large.
Unlike the previous loggers, the output file does not change its name every time, but always uses the name you set in the box “Log file name”. This allows you to use a real-time viewer, and the viewer will always know the name of the file to read.
If you also want files with progressive dates enabled “Backup log files”.
Starting with version 1.1 we have added the ability to customize the first lines of the LOG file, There's a new button “Edit heading text” To edit the file “_Heading_Text_.txt”, To delete custom rows, just leave it blank or delete it.
Starting with version 1.1 We've also added the ability to send commands from other applications through Text Slots.
The text commands that can be used are: “LogRun”, “LogStop”, “LogPause”, “LogResume”, “BackupFile” and “RecordingInterval n.nnn”, where n.nnn is the time in seconds and fractions of a second down to thousandths.
You can see the text commands and try using them by opening Automation and then uploading the file “Commands_to_LOGGERS.txt” located in the folder “ProgramsDemo ProgramsSlotText Commands”
Downloads dei Theremino Logger12, Logger24 and LoggerNN
Theremino_Logger12_V1.2.zip
Theremino_Logger12_V1.2_WithSources.zip (version for programmers)
Theremino_Logger24_V1.1.zip
Theremino_Logger24_V1.1_WithSources.zip (version for programmers)
Theremino_LoggerNN_V1.2.zip
Theremino_LoggerNN_V1.2_WithSources.zip (version for programmers)
For all Windows systems to 32 and 64 bit (for Raspberry Pi, Linux, Android and OSX, read the installation notes.
Theremino Graphs
With this application you can view the files produced by the Loggers more or less as you could do with Microsoft Excel.
However, you can easily make various types of visualizations that would be impossible or difficult to set up with Excel. And you can also do them in real time, i.e. while the Logger is writing the file.
For instructions, open the options editor by pressing the “Edit axis options” and then press its HELP button, as seen in the next picture.
With the “Select file” You choose the file you want to view and with the “Select axis options” You choose the file with the display options.
Depending on what you set in the X-axis name, you can have scatter plots (where the X-axis is one of the variables) or charts with the X-axis representing time.
These possibilities are explained in the file that you open by pressing HELP.
In the Graphs application you will find some option files and some data files to test. Normally the data file will be the one written by a Logger and you will have to indicate to Graphs where it is by pressing “Select file” and then locating it in the Logger folders.
Theremino Graphs documentation
Theremino_Graphs_Help_ENG.pdf
Theremino_Graphs_Help_ITA.pdf
Theremino_Graphs_Help_ENG.odt
Theremino_Graphs_Help_ITA.odt
Downloads di Theremino Graphs – Version 2.3
Theremino_Graphs_V2.3.zip
Theremino_Graphs_V2.3_WithSources.zip (version for programmers)
For all Windows systems to 32 and 64 bit (for Raspberry Pi, Linux, Android and OSX, read the installation notes.
Theremino SeriHAL V 2.2
Theremino_SeriHal lets you send to slots data from a serial port and send the data to the serial port of the Slot.
Communication SLOTS <-> Serial (Real or virtual) is bi-directional and, If desired also the transmission, This can be either synchronous or asynchronous.
You can then connect to PC any Hardware or Software interface that sends and receives data through a serial port. And you can send data to and receive numerical data to one or more slots. The data can then be processed by other applications in the world Thereminico and, for example,, displayed with the SlotViewer and the SignalScope or registered with the Theremino_Logger.
By now the world thereminico can communicate not only with Arduino and Processing, But even with Octave (the poor cousin and free of MatLab), with Python and other SW still: just need load their serial plugins. Think about what you can do by managing the OpenCV computer vision functions via Python/Numpy and dialoguing with the slots Theremino-HAL and Master/Slave modules: facial recognition, mechanical/optical tracking, real-time image processing and other graphics of the highest level within the reach of (almost) all.
The instructions and the communication protocol are in the file “SeriHal_v 2.2 _eng” you will find in the folder “Docs”.
Aalso this is a brilliant application of Marco Russiani. In the DOCS folder there are two small files in Italian and English. Had nothing but Marco has recently discovered the supernova SN2017gfh. It's not every day you have a friend who has discovered a star, We had to write it!
Notes for versions
Version 2.3
– The error that occurred when pressing “Disconnect”.
– Improved the speed of receipt.
– Reduced CPU consumption.
– If the separator is not recognized, then use the space.
Theremino_SeriHAL_V2.3_WithSources.zip
For all Windows systems to 32 and 64 bit (for Raspberry Pi, Linux, Android and OSX, read the installation notes
Theremino Terminal
This application allows you to Exchange characters with a serial port. Type applications “Terminal” are primarily used to communicate with the firmware of the micro-controllers, during the trial operation and when writing firmware.
To read the brief instructions, press the small button “Help”.
During the development of the firmware of NetModule (see This page) We had to check the debug data from the micro, through the virtual serial and USB port. Initially we used applications downloaded from the internet such as “PuTTY”. But they are complex and uncomfortable. Then we wrote this application that made it so simple.
The Theremino Terminal is in a single executable file from 500k, It is easy to use and requires no installation. A good example of simplicity and minimalism, What are the main features of the system theremino.
– – – – – –
Magnificent improvements writer firmware!
In version 1.2 we introduced the new commands “Decode to Slots”. With these commands, you can send the values of the internal variables of the firmware, to the Theremino system applications.
It is not just to read the values in the text terminal, how do you usually, but by a true communication of numerical values at high speed (up to nearly a thousand lines per second and tens of thousands of individual variables on the second). In practice they are able to see the variations of the internal variables of the firmware, as if they were linked to an oscilloscope.
The firmware is sent to the serial values of variables that you want to follow. They send all the values on a line, separated by spaces, semicolons, commas or two points. The Terminal application interprets values, which can be integers or decimals, and sends them to the selected slot and the subsequent. There are also three special decoders for the two models most common gauges and comparators.
You can then use the Signal Scope (or other applications of the system Theremino), to see the variation in the time of their values. Meanwhile, in the terminal window you have a list of their past values. An exceptional comfort, better than a hardware debugger!!!
In the following picture you see the command values (in blue) and the mechanical response (in red) a servo motor controlled by a PID written in a PIC12F1572. The image that is seen in the oscilloscope HAL comes from the control signal (Servo-16) and a Adc16 connected to the servomotor feedback potentiometer. Instead the two tracks of the upper image, are the values of two internal variables of the PIC.
The values of variables are passed through the serial, the application Terminal, Slots and were finally displayed by the application Theremino SignalScope.
It seems to connect an oscilloscope inside the firmware. For people using micro, and especially for the writer of the servo control firmware, this is a possibility exceptionally useful!
In version 2.0
We have improved the reception and decoding algorithms, increasing greatly the reliability of the received data. We also reduced the load on the CPU of at least ten times, making possible the decoding of tens of thousands of variables per second even on slower computers.
In version 2.1
– We fixed a bug that only showed data after a certain number of incoming lines. Now you can immediately see the arrival of a single character.
– Now you can change the name of the executable and make more than one work in the same folder.
(for example Theremino_Terminal1.exe, Theremino_Terminal2.exe, Theremino_Terminal3.exe …)
Downloads at Theremino Terminal – Version 2.1
Theremino_Terminal_V2.1.zip
Theremino_Terminal_V2.1_WithSources.zip (version for programmers)
For all Windows systems to 32 and 64 bit (for Raspberry Pi, Linux, Android and OSX, read the installation notes)
Theremino ComByTCP
This application connects COM ports between two PCs, even very distant ones. We used it between Italy and China and it worked well.
To make it work, you need to have the virtual ports that you install with com0com that you can find in the com0com/Installers folder.
And’ An application for specialists, We've used it little and don't remember much about how it works. But as far as we know, it gets the job done.
Version 1.0
– This is the first published version, we didn't try it for long but it worked well to read a GPS module that was in China.
Downloads di Theremino ComByTcp – Version 1.0
Theremino_ComByTcp_V1.0.zip
Theremino_ComByTcp_V1.0_WithSources.zip (version for programmers)
For all Windows systems to 32 and 64 bit (for Raspberry Pi, Linux, Android and OSX, read the installation notes)

